Hello all!
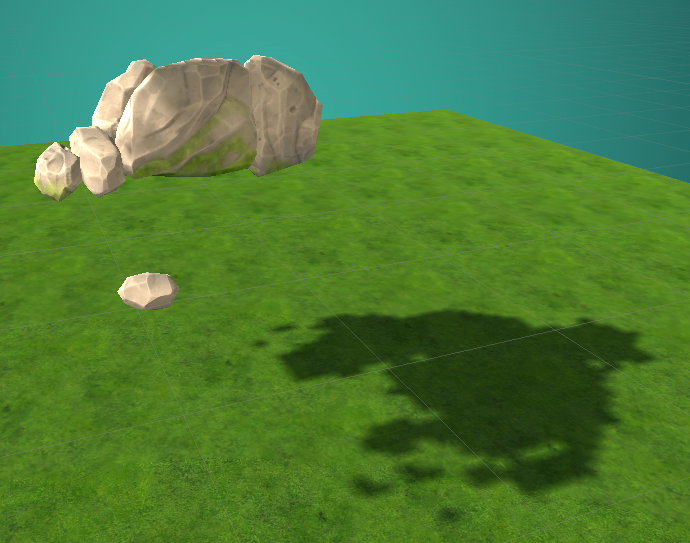
I made another tutorial for ASE. This one covers the camera depth fade to make an object wash out in a certain color as it travels into the the distance. I plan on making another video today that also incorporates dithering in a cool way.
Second topic: has anyone used the clip panes node? I want to make a demo video for every node but I have no idea how to use this one!! I read the wiki page for it but am having trouble coming up with a way to use it practically. Any advice is appreciated!
Third topic: would it be possible to add a splitter node? The clip panes output would be a lot easier to understand if I could look at the output of the 4 float values individually. Has anyone tried to implement this? It should be possible to split the COLOR and FLOAT4 values into 4 separate outputs by passing them through some kind of splitter node.
Hello!
We have our own diffuse lighting miscalculation system, which I would like to connect or repeat in ASE. I tried to repeat the system using Custom Lighting in ASE, but it is limited to Forward rendering(Indirect Diffuse node and Indirect Specular node work only in Forward), which deletes us unacceptably, because We need a Deferred renderer.
Questions:
Can you make a choice between “Lighting _Deferred” and “Lighting ” for “Custom Lighting”?
If the first item is not possible, can I somehow add my lightning to the “Light Model” list in the editor?
Can you implement custom light connection from Includes?
Apologies to all for the late replies, our developers are currently taking some time off for the holidays, rest assured that we’ll get back to you as soon as possible! Thank you for understanding.
We have plenty in store for ASE in the next year, and one of our priorities for early 2018 is support for multi-pass which will be invaluable for custom terrain and skin shaders.
I will register your suggestion regarding skin shading models, thanks!
We’ll have to get back to you on this as soon as the developers are available.
We currently don’t have much to share other than the fact that we plan to support it as early as possible.
In any case, it’s safe to assume that all shaders, including existing ASE shaders, will require some conversion work.
We’ll have to get back to you on this as soon as the developers are available.
That transparency effect is possible to achieve through the use of the transparency settings/blend mode in the main node, but it will depend on the approach and specificity of the shader you want to build. You may refer to this documentation for more information on the blend modes currently available: ShaderLab: Blending.
You may also check out our Transparency sample at AmplifyShaderEditor/Examples/Official/Transparency in order to get a few pointers on how to get started in building a shader with transparency.
Could you send us your shader sample through support@amplify.pt? Thanks!
I think it will be enough to realize the transmission of its own diffuse lighting. Now, inside my own lightning, I substitute only the diffuse component of lighting. I have thoughts on how to implement this. Write to me in private messages when there is an opportunity. Thank you.
Hi! How would you go about replicating the Pixel Depth Offset from UE4 hair shader? Is modyfying depth per pixel even possible in ASE? I’ve tried to mimic it using depth fade node but with no success
I have a request as addition to the Flipbook Texture Animation node.
I think it could be helpful to have as output, the frame of the animation where the flipbook is.
It seems a duplicate of the StartFrame but I’m in a situation where the an animated flipbook texture is used as a loop for the Task A and while the loop is going on, I need to use the last frame of the first loop for the Task B.
Or do you know how to do this with the nodes we have now?
Hey there! Unfortunately, not at the moment, since Unity’s standard surface shader does not support depth output, but we’ll be investigating means of providing this through our Shader Templates as soon as we have implemented multi-pass support.
Hello, thank you for the suggestion, I’ll register your request and we’ll get back to you as soon as possible.
How does the Local Vertex Position ( Absolute Vertex Output ) work? I’ve tried using a vector3, float and just an image but the meshes that use the shader just disappears.
I’ve used the Relative Vertex Output which offsets the vertex as I expect, but I can’t seem to figure out how to make meshes be offset in a certain direction. But they all just offset from their local space in this mode.
I don’t think you are doing anything wrong, I tried the same thing and it seems to be working just fine, I although I can’t quite get to the same look you have. Send me the shader please, maybe I’m missing something.
All I can say for now is that I’ve been looking at it to measure what needs to change and how. It’s still a bit early to tell. Some things seem pretty obvious but others not so much. We’ll inform everyone as soon as we have figured out what to do.
Good one, as a suggestion, if you use your own blue noise pattern (maybe we should provide one) and change the node to be able to use it’s own pattern you can generate dithering with far better visual results.
I’ve looked at what needs to be added for deferred custom lighting and unfortunately it seems to be a wasted effort, while Unity does allow to create your custom behavior to some parts of the deferred pass it will not work correctly in most situations. I haven’t totally gave up on it but for now it seems to be out of the scope of ASE. Because deferred is a way to treat everything the same way by doing the lighting part in screen space it defeats the purpose of having one special object different from the rest, that’s what forward rendering does. In order to change it and create a true custom lighting for deferred you would need to change the internal shaders :\
So for #1 no, not for now at least. For #2 you could try adding your own template with a deferred pass but I suspect you will find the same issues. #3 yes, unless you need something more specific you can add your own functions in the include file and call them using a custom expression node.
When you say you only need the transmission of the diffuse value do you mean the transmission output port of simply passing the diffuse value through? Can you give a specific example on what you are trying to achieve? Maybe there’s a different approach to it.
I guess the closest you could do is using the refraction port or a refraction shader in general. Let me say tho that transparency in general has all sort of issues in realtime rendering. Don’t get your hopes up to get close to that effect from the video, focus on the “feel” of the effect instead. One of the main issues you’ll find right away is ordering of transparent objects. It’s not completely impossible but not viable or practical. Another is that in order to get a good looking refraction you’ll always need a proper path tracing which out of question so you’ll never get the good looking blacks in the glass when they are outside of the camera view. Finally, I don’t know what it is for but performance will most definitely haunt you.
Is this related to your other question or is it a new issue? (I’ve received your package and I’ll look at it next).
Shadows might not behave has you expect them to behave if what’s clipping them is different from the perspective of the light. For instance, if you are clipping them using a screen position value it will give you either results because the screen projection is different for shadows. It’s not totally impossible to change it but it requires some use of shadow specific keywords to filter the different behavior and the necessary transformations which aren’t always easy to get. What are you using to clip yours?
That output represents the local position of each vertex, so if you give it a flat value with will either move all vertices the same way if it’s in relative mode or override their position to the same value if it absolute mode. In order to differentiate between them you need to make some analytical calculation, for example, by either using their current location of their current normal, that way you can make them different. I suspect that what you want can be found in the extrusion sample we provide, in that one we use both vertex position and vertex normal to deform the mesh. You can also use images as you can see from the tessellation sample.
This is another issue. I’ve sent a project example to support email. I’m using pure color/mask value to clip, so it should be same regardless of distance/lighting/etc.
I just need to embed my “calculateGI” function in your editor. I checked - it is perfectly assembled from the Editor’s Nodes.
I see this mode like this:
On the main node there is an additional slot “Custom Diffuse GI”, in which you can send the prepared information.
All that can not work in Deferred mode is blocked.
Thanks for your answer, I will try to do to as you told. Of course that I understand that I will not get exactly same effect, because this is a 3D rendering animation, and Unity is different way of rendering, but I agree to have something similar in some way. In fact I have put additional examples, to show that what I want is to simulate the plexiglass or acrylic plastic effect.
I have seen in the forum that it seems that using a Thickness map, it would give a more realistic transparent effect based on the thickness of the object itself, so I wonder if there is some way to use a Thickness map in Amplify shader. Sorry that I am very new to this asset and have no idea of the features and nodes available.
HOW TO USE DIFFERENT RENDER MAPS?
Also want to know how to use a vertex map to mark and define clearly the edges of a mesh.
How many render maps are compatible and available to be used with Amplify Shader Editor?
Please, is there somewhere where is told about the different kind of render maps that can be used? for example
The deferred pass in these shaders only allow you to specify the content of each buffer because it will then be used to calculate the final light on the surface.
So correct me if I’m wrong, you don’t necessarily want to do custom lighting, only custom GI. Am I correct? From what I understand of your sample code you might not even need a custom lighting setup and the standard surface shader should do just fine as long as you could use your own gi data. For instance why not just change the GI function instead?
Just to clarify, aside from normal maps which are little bit different every other is just a regular texture. What you do with that texture and how you map it is up to you really. ASE has the standard outputs for the most common unity parameter like albedo, smoothness and so on. A curvature map or a thickness has no meaning by itself. I assume you would use a thickness map to something like SSS or translucency (which btw its an actual output port in ASE and the sample provided actually uses a thickness map that we calculated in knald if I recall correctly), but you could also do other things with it so that when the editor comes in handy. You could very well add a curvature map (drag and drop texture inside the editor) and connect it in some way that makes sense to you. For instance you could add or subtract that curvature from the smoothness parameter to make hard edges more or less rough.
The detail maps are another example, these are just maps that are rendered with much higher and repeated UVs and then combined with the main main.
There’s no standard for this so there’s no documentation for those maps. It up to the user to decide. I would recommend you to check our wiki for more information and check individual node documentation to know more about them with some examples, like the texture sample.
If you want a more specific example just ask about it and I’ll try to guide you through it.