Well it was a fresh import but from the asset store. Let me get the newest version from the site and see if it has the same issues.
…My order # from Unity Asset Store is not unlocking the updates on the Amplify website.
Well it was a fresh import but from the asset store. Let me get the newest version from the site and see if it has the same issues.
…My order # from Unity Asset Store is not unlocking the updates on the Amplify website.
use this link http://amplify.pt/downloadbeta/
place your invoice number without the first “OR” letters
click the unlock button and check if the download button shows up
For some reason only that link works for me, if I try in the main download page it doesn’t work.
Ok so that worked to download but the example shaders are still not loading with their corresponding textures assigned for them for use in the example scene. at least not for me
Request: Gaussian Blur a texture
I think to solution should be something similar to your first suggestion, being able to do multiple fetches to the grab pass texture. We will start working on this, also because it will fall a bit into ZackLeodrano suggestion.
You only need to have one grab pass, I think having multiple ones doesn’t make much sense since accessing the frame buffer results is always going to be the same all across the shader in each frame.
Rest assured, we will add additional workflows on future betas. We will work on Substance integration and that might be the perfect time to implement this.
Your requests were registered into our roadmap.
We already support it. On the shader properties dropdown you can select ‘Standard Specular’ via the 'Light Model, dropdown.
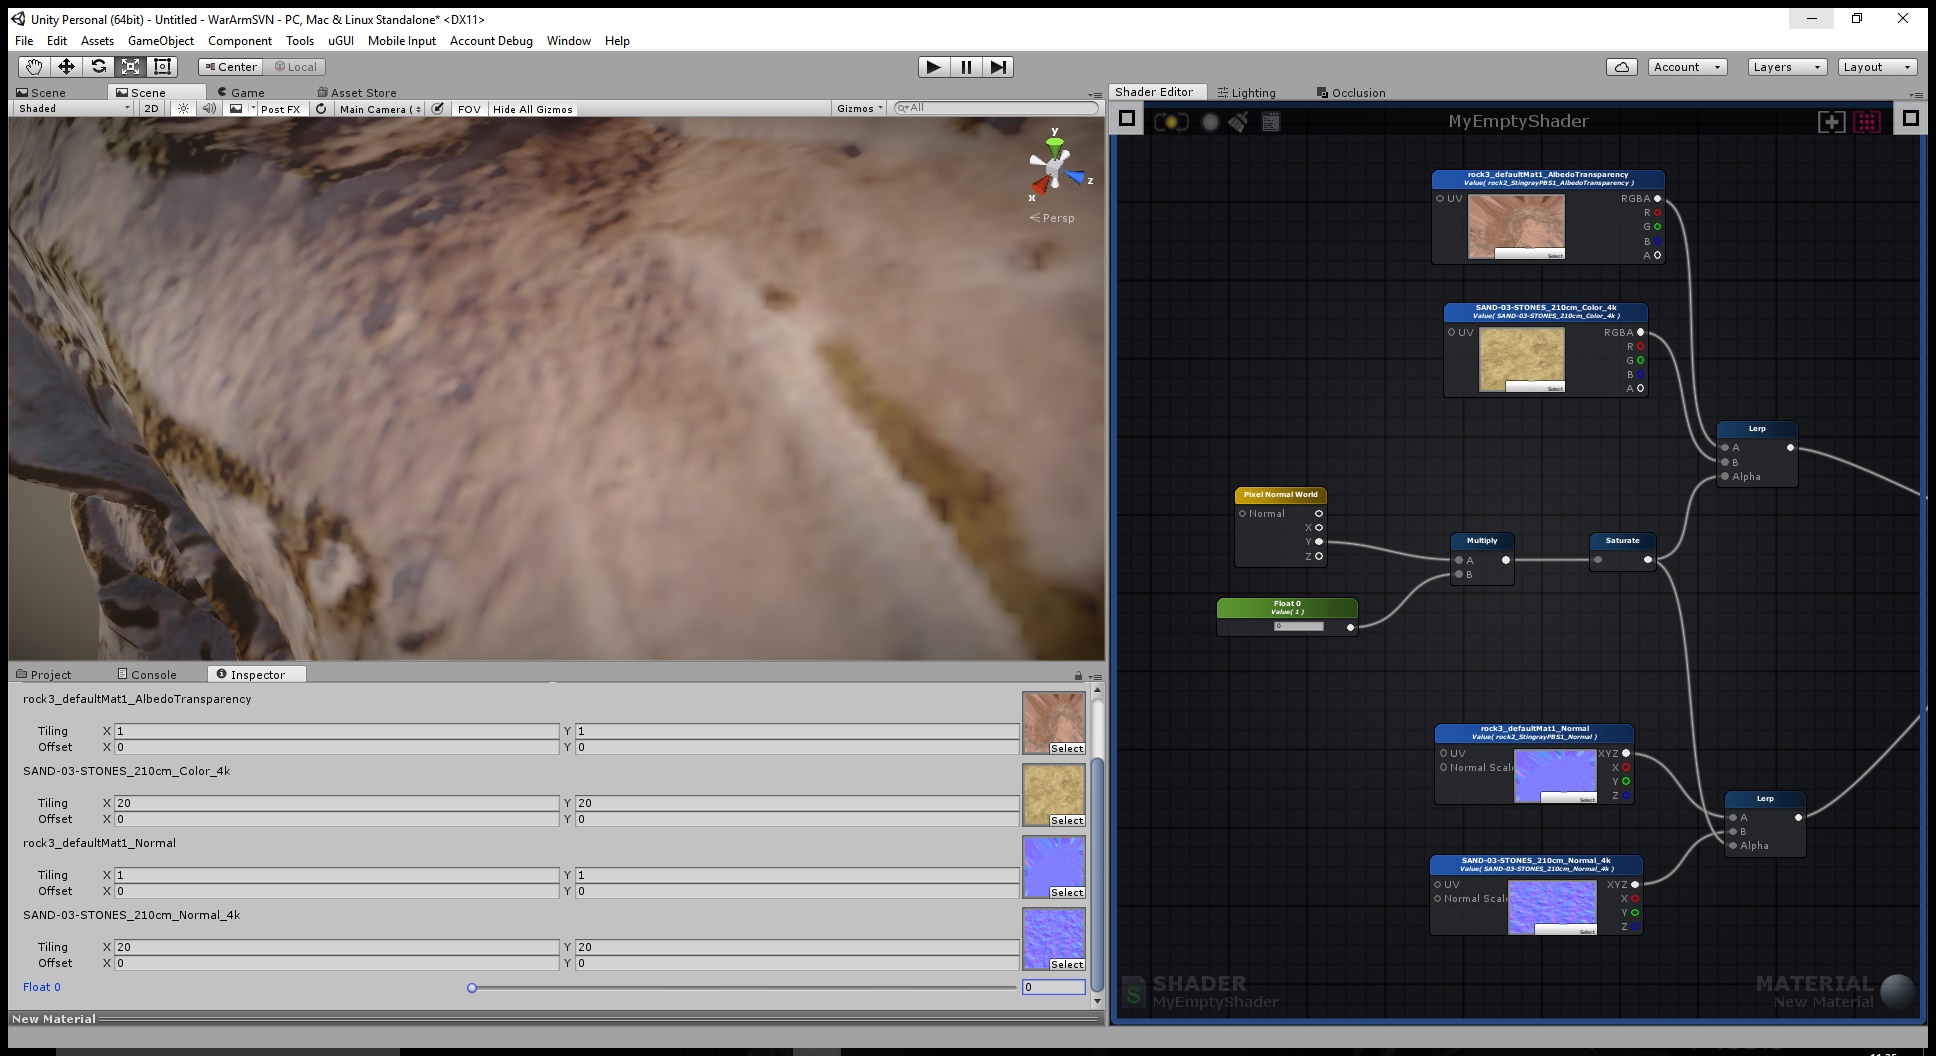
Like kebrus as already commented we are lerping normals using the “pixel normal world” node on our SnowAccum example. Does this example solve your issue?
Please let us know if you need additional help.
When opening the shader, you will load the node graph with the shader default values are for the examples these aren’t any ones assigned.
Try double clicking on the material instead of the shader. This will open ASE in Material Mode and you will be able to check which textures are assigned to the material.
We really encourage you editing your graph in Material Mode. More so because you can instantly see your material changing when modifying property nodes even without having Live Mode on.
A gaussian blur node is a really nice request! Already registered it on the roadmap!
Hi @Amplify_RnD_Rick , bought the asset and I’m aware it still in beta. Following the steps on the webpage to create my first shader/material I’m seeing this error message popping up 417 times in my console:
NullReferenceException: Object reference not set to an instance of an object
AmplifyShaderEditor.CustomMaterialInspector.OnInspectorGUI () (at Assets/AmplifyShaderEditor/Plugins/Editor/Utils/CustomMaterialInspector.cs:208)
UnityEditor.InspectorWindow.DrawEditor (UnityEditor.Editor editor, Int32 editorIndex, Boolean rebuildOptimizedGUIBlock, System.Boolean& showImportedObjectBarNext, UnityEngine.Rect& importedObjectBarRect) (at C:/buildslave/unity/build/Editor/Mono/Inspector/InspectorWindow.cs:1235)
UnityEditor.DockArea:OnGUI()
I’m on Unity 5.4.1f1 on Windows 10 (Anniversary edition) in case the versions do matter.
Hey cygnusprojects,
This was not the way we intended for your first experience with ASE to be. We’re truly sorry for that.
A new version was now uploaded into our Beta area with this bug fixed.
Please let us know if you have any other issues or require any help with ASE. We truly want for everyone to have a great experience with this plugin.
hi so i have tried your son accum and it doesn’t work, because the snow normal are not showed out.
I have some other screens about my node and what i want to do
no normal map here
and here you can see there isn’t any differnce on the normal map with and without
thanks in advance for the support 
I see what the problem is now. Yeah I can confirm your problem, it’s even in the demo itself to.
What’s happening is that pixel normal world uses the WorldNormalVector function to calculate the normal by using itself before it’s possible? it’s weird, but the reason it works for the albedo is because the lerp always gets the value 0 for the alpha and selects the first normal which is then used for the albedo.
I was actually able to make it somewhat work by using the similar vertex normal world node which blends the normals by their geometry alone.
Unfortunately I was unsuccessful in using that new normal as the input of the rest because the editor is not compiling for some reason
Nevermind, I got it working, duplicating nodes was giving errors for some reason. See image for the final solution.
The way to properly solve this would be to use a height field and blend the normals using that height. Without it, you’ll notice that the normals blend linearly with my solution and it doesn’t look very good :

Hello, I have 2 questions:
Thanks
Hello,
Thanks!
Hi guys,
We just uploaded a new version into the beta area!
Here are the release notes:
Release Notes v0.1.3 dev 001
For this build we added a new ‘Texture Reference’ feature. This is a feature that both ZackLeodrano and kebrus requested as a ‘Texture Asset’ node.
We decided to implement it in slightly different way.
Each ‘Texture Sample’ node now has a ‘Type’ dropdown where you can select two values, ‘Object’ or ‘Instance’.
On ‘Object’ mode the node behaves exactly how it was before and creates its own property.
When selecting ‘Instance’ mode, the default UI is replaced with a ‘Reference’ dropdown which lists all ‘Texture Sample’ nodes which are in ‘Object’ mode. By selecting one of the ‘Reference’ nodes will establish a link with them a will be using their properties instead of its own.
The node UI will change so you can clearly see it’s referencing another node. A chain icon will appear and the texture previewer will no longer be editable, instead by clicking on it will move the camera over the ‘Texture Sample’ node it is referencing. ( clicking the chain icon will also do this )
In order for you to change the texture you will need to do it on the main ‘Texture Sample’ node as it will no longer be available on the reference nodes.
A small demo was added ( ‘Samples/SimpleBlur’ ) so you can quickly see it in action.
We decided on this approach because its cleaner as you don’t need extra nodes and wires on the canvas to use it. But we would really like for you guys to try it out and give us some feedback on it.
Please let us know if you like this approach or prefer a separate ‘Texture Asset’ node which links to the ‘Texture Sample’ nodes.
Happy shader creation!
Just checked it out, works great so far!
EDIT:
No wait, found a bug, because the texture sample object nodes are not connected to anything the brush button will remove them. And if the texture sample object node doesn’t have a texture in the shader editor and a texture sample instance is referencing it generates a missing object reference error in the console
spaceemotion reported a visual issue with texture samples with normal map mode selected. I’ve just uploaded a new version with it fixed.
I’ll take a look at this and will fix it asap.
EDIT: Just uploaded a new version with the reported bugs fixed.
I like the new way of handling multiple samples. Something like a triplanar shader is now a lot more user friendly and intuitive. I think it might be a good starter for the UV mixer requested before as well. Maybe I’ll take a bite on that.
Any possibility to expand it to include the screen color node?  I know I’ve been pushing this for a long time but I’m just a small step away from having a cool shader completely created with your editor.
Yes, definitely!
EDIT: For the screen color node will be a simpler so expect this feature soon!
I just noticed something weird. Isn’t fresnel node supposed to be a way to react with view direction? the most simple way would be V.N but there are more pretty and correct ways to do it. I’m not even sure what yours is doing. It’s using object vertex position?
Just outputting the fresnel node doesn’t make sense to me. Or am I missing something?
Fresnel effect takes both Incident and Normal vectors.
You can take a look at these links for a quick explanation:
Link 0
Link 1
These links are also on the Fresnel Node source code ( FresnelNode.cs ) as commentary.
But nevertheless, I’ll do a check on the generated code and see if there is something wrong.
But the incident ray is the eye. Thats why sometimes people just refer to the fresnel effect as the “grazing angles” reflection and what not. Your current code is calculating the world position of the vertex and using as the incident vector.
[edit]
A bit of a correction after reading the pages, the incident ray is the eye in this case. It can also be used in other setups where the incident ray is the light vector, but usually in shaders what people want with the fresnel is the eye vector. Maybe you could make it a choice but it’s definitely not the vertex position.
Yes, just confirmed it. Your absolutely right.
It should have been using the normalized result of the subtraction between vertex position and cam position and not the vertex position itself.
This will be fixed on the next update.
Glad you caught that one!