Saying hi from 2026 here! I too had this issue with a custom PropertyDrawer for a custom PropertyAttribute I was making, and found out exactly what was going on after a LOT of struggle, so thought to share my end-all solution for future googlers!
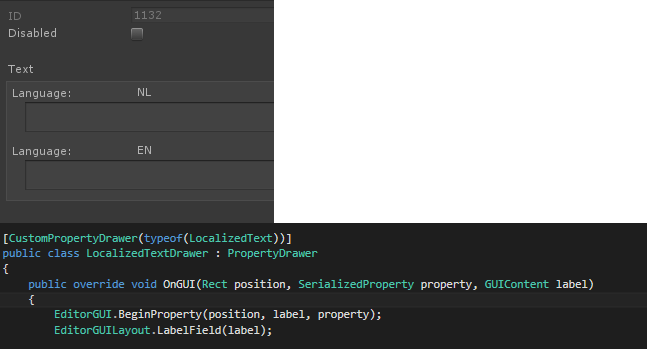
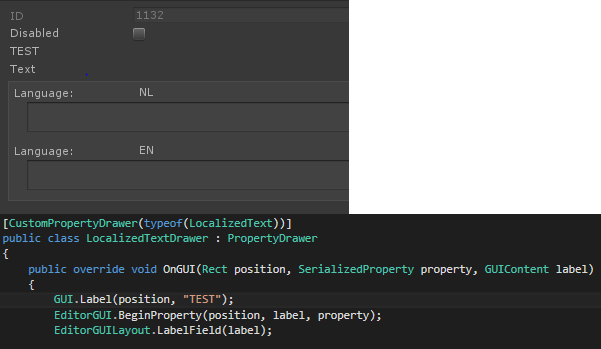
As @Pharan really nicely shows in his last reply is how the formatting of the space changes depending on if you use the EditorGUI.BeginProperty() / EditorGUI.EndProperty() functions, and how EditorGUILayout functions create and reserve their own space in the GUI, creating the extra spacing.
For any kind of PropertyDrawer/DecoratorDrawer, you need to do 2 things, USE the GetPropertyHeight() override function, and then only use EditorGUI or GUI functions, adjusting their input position rect parameters around as you see fit.
Before I show an example of a correctly setup script, I just want to highlight the “hacky” advice given above, and why it is bad advice of which you should avoid:
If you try to use the a EditorGUILayout function, as previously mentioned, this adds the extra space required for those layouts underneath a seemingly empty line/space. This space above is the original reserved space for the PropertyDrawer, plus a bit of spacing before the next EditorGUILayout element is drawn, resulting in a space with a height that equals EditorGUIUtility.singleLineHeight (18 pixels) + EditorGUIUtility.standardVerticalSpacing (1 pixel).
If you try to set the GetPropertyHeight() override function’s return value to 0, that only changes the height of the previous reserved space (the by-default, 18 pixels), yet still the spacing between that GUI and the following produced by the EditorGUILayout’s function (the by-default 1 pixel) will remain, so you’ll notice an odd 1 pixel bumper space between the previous inspector GUI and this property. It’s really obvious in a list of properties like so:
Another erroneous solution I’ve seen passed around is to use the EditorGUILayout.GetControlRect() function to build the position rect for use in your EditorGUI & GUI functions. This does correctly generate a rect that matches the passed in desired height, but NOTE, it is a EditorGUILayout function! So it’ll build the space for it after the already reserved space!
~Now, the correct solution is as follows!~
Use the GetPropertyHeight() override function to setup the desired height of the PropertyDrawer’s total height. In my case I wanted to use the original height of the property, which you can get using the EditorGUI.GetPropertyHeight() function, passing in the property, and if you wish to includeChildren. This second parameters refers to if the SerailizedProperty has child properties, such as a custom class that’s marked as [System.Serializeable] and inside that class is SerializedProperties, such as a string Name, float size, or Vector3 Position. I personally always pass includeChildren as true!
This GetPropertyHeight() override function is called first, then the OnGUI override function is called, and so to save on computing the height of your desired property twice, you could save the output of the earlier called EditorGUI.GetPropertyHeight() into a private float field within the class for use in the OnGUI override function! Now that the height was computed, the passed in position rect of the OnGUI function will have the correct position.height set to match! Now any EditorGUI or GUI functions can use the position rect to size themselves properly within the PropertyDrawer’s height!
Here’s an example I have for a custom attribute that has the property as it was before in a column on the left, then a new button on a column on the right edge:
And here is the results in that same list from earlier, and in use by a custom Serializeable class with child serialized data, all correctly formatted and showing prefab override highlights:
I hope with helps someone in the future, and provides the relevant information to work out what’s going wrong with their script!


or, if you want to be extra elegant: public override float GetPropertyHeight(SerializedProperty property, GUIContent label) => 0;
– LukaKldiashviliThanks for the super precise fix!
– HunterProduction