Hi @thubbardnd!
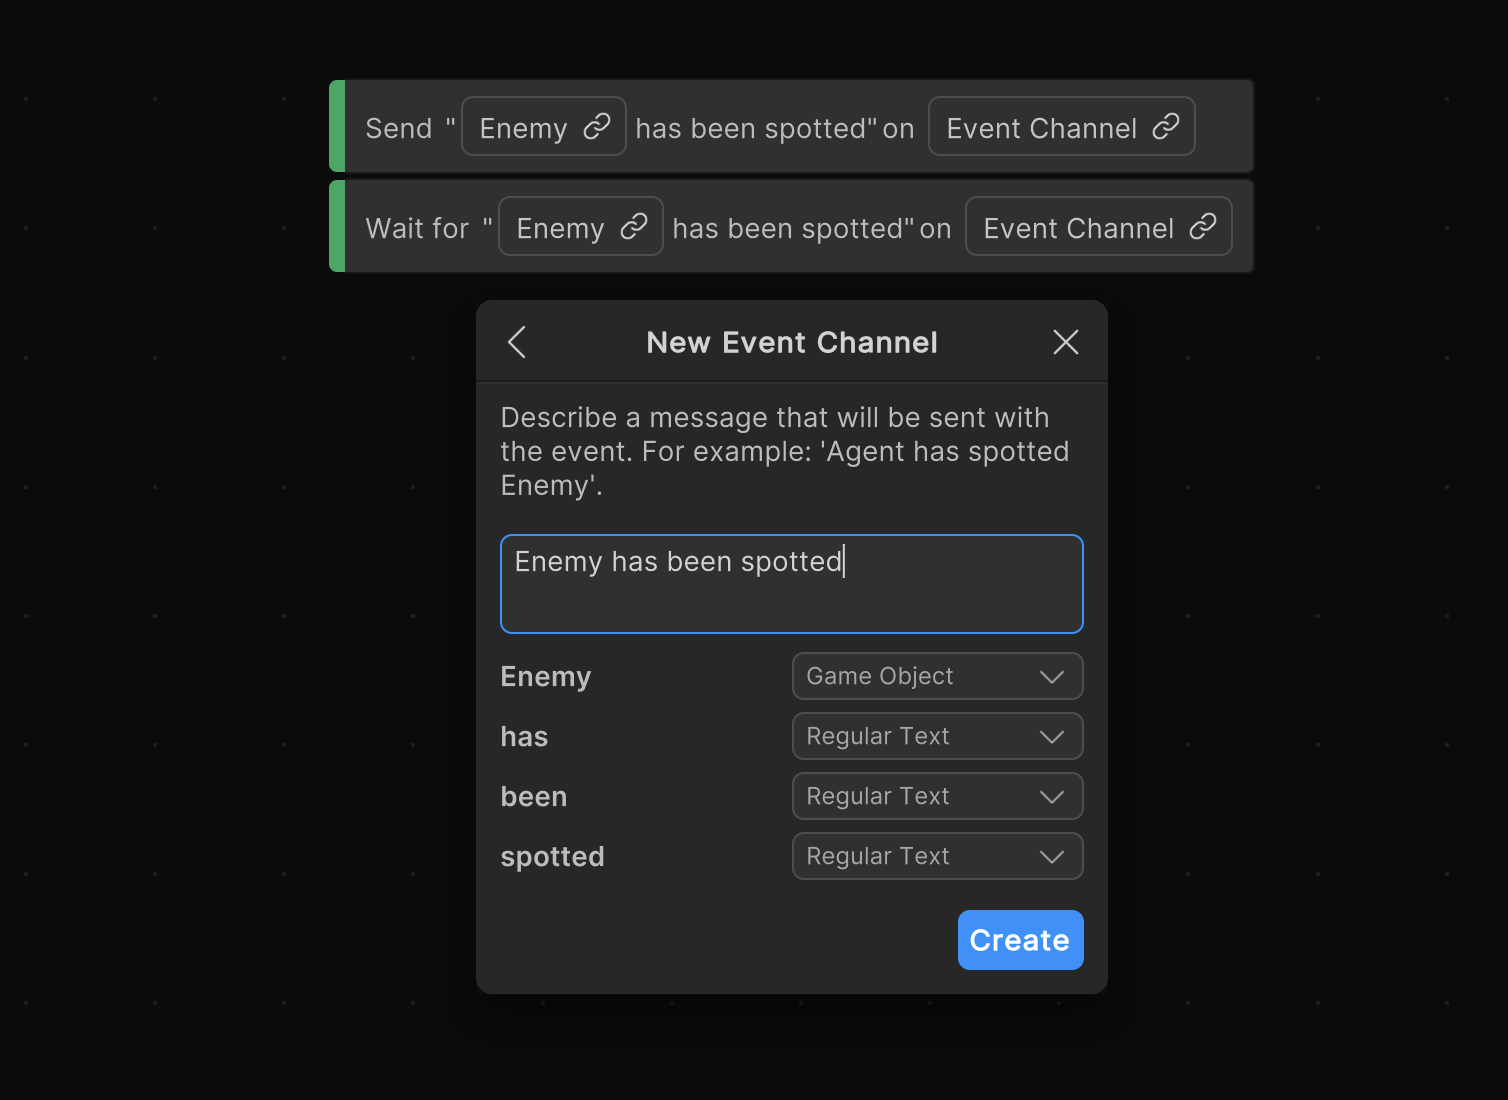
To get started with Event Channels, you can create a new Event Channel through the “+” menu on the Blackboard (Events > Add new event channel type). This will open a event channel wizard window, where you can define your event name and message, and any variable types you want to send with the message:
To add an event channel variable to your Blackboard, you can now go back to the same “+” menu and add a new variable from your newly created channel. We’re planning to make this a bit easier so that a channel variable would be automatically created on the Blackboard after creating a channel, but for now you’ll have to go and create one from the menu yourself. After doing this, you should have a ready to use event channel variable on your Blackboard.

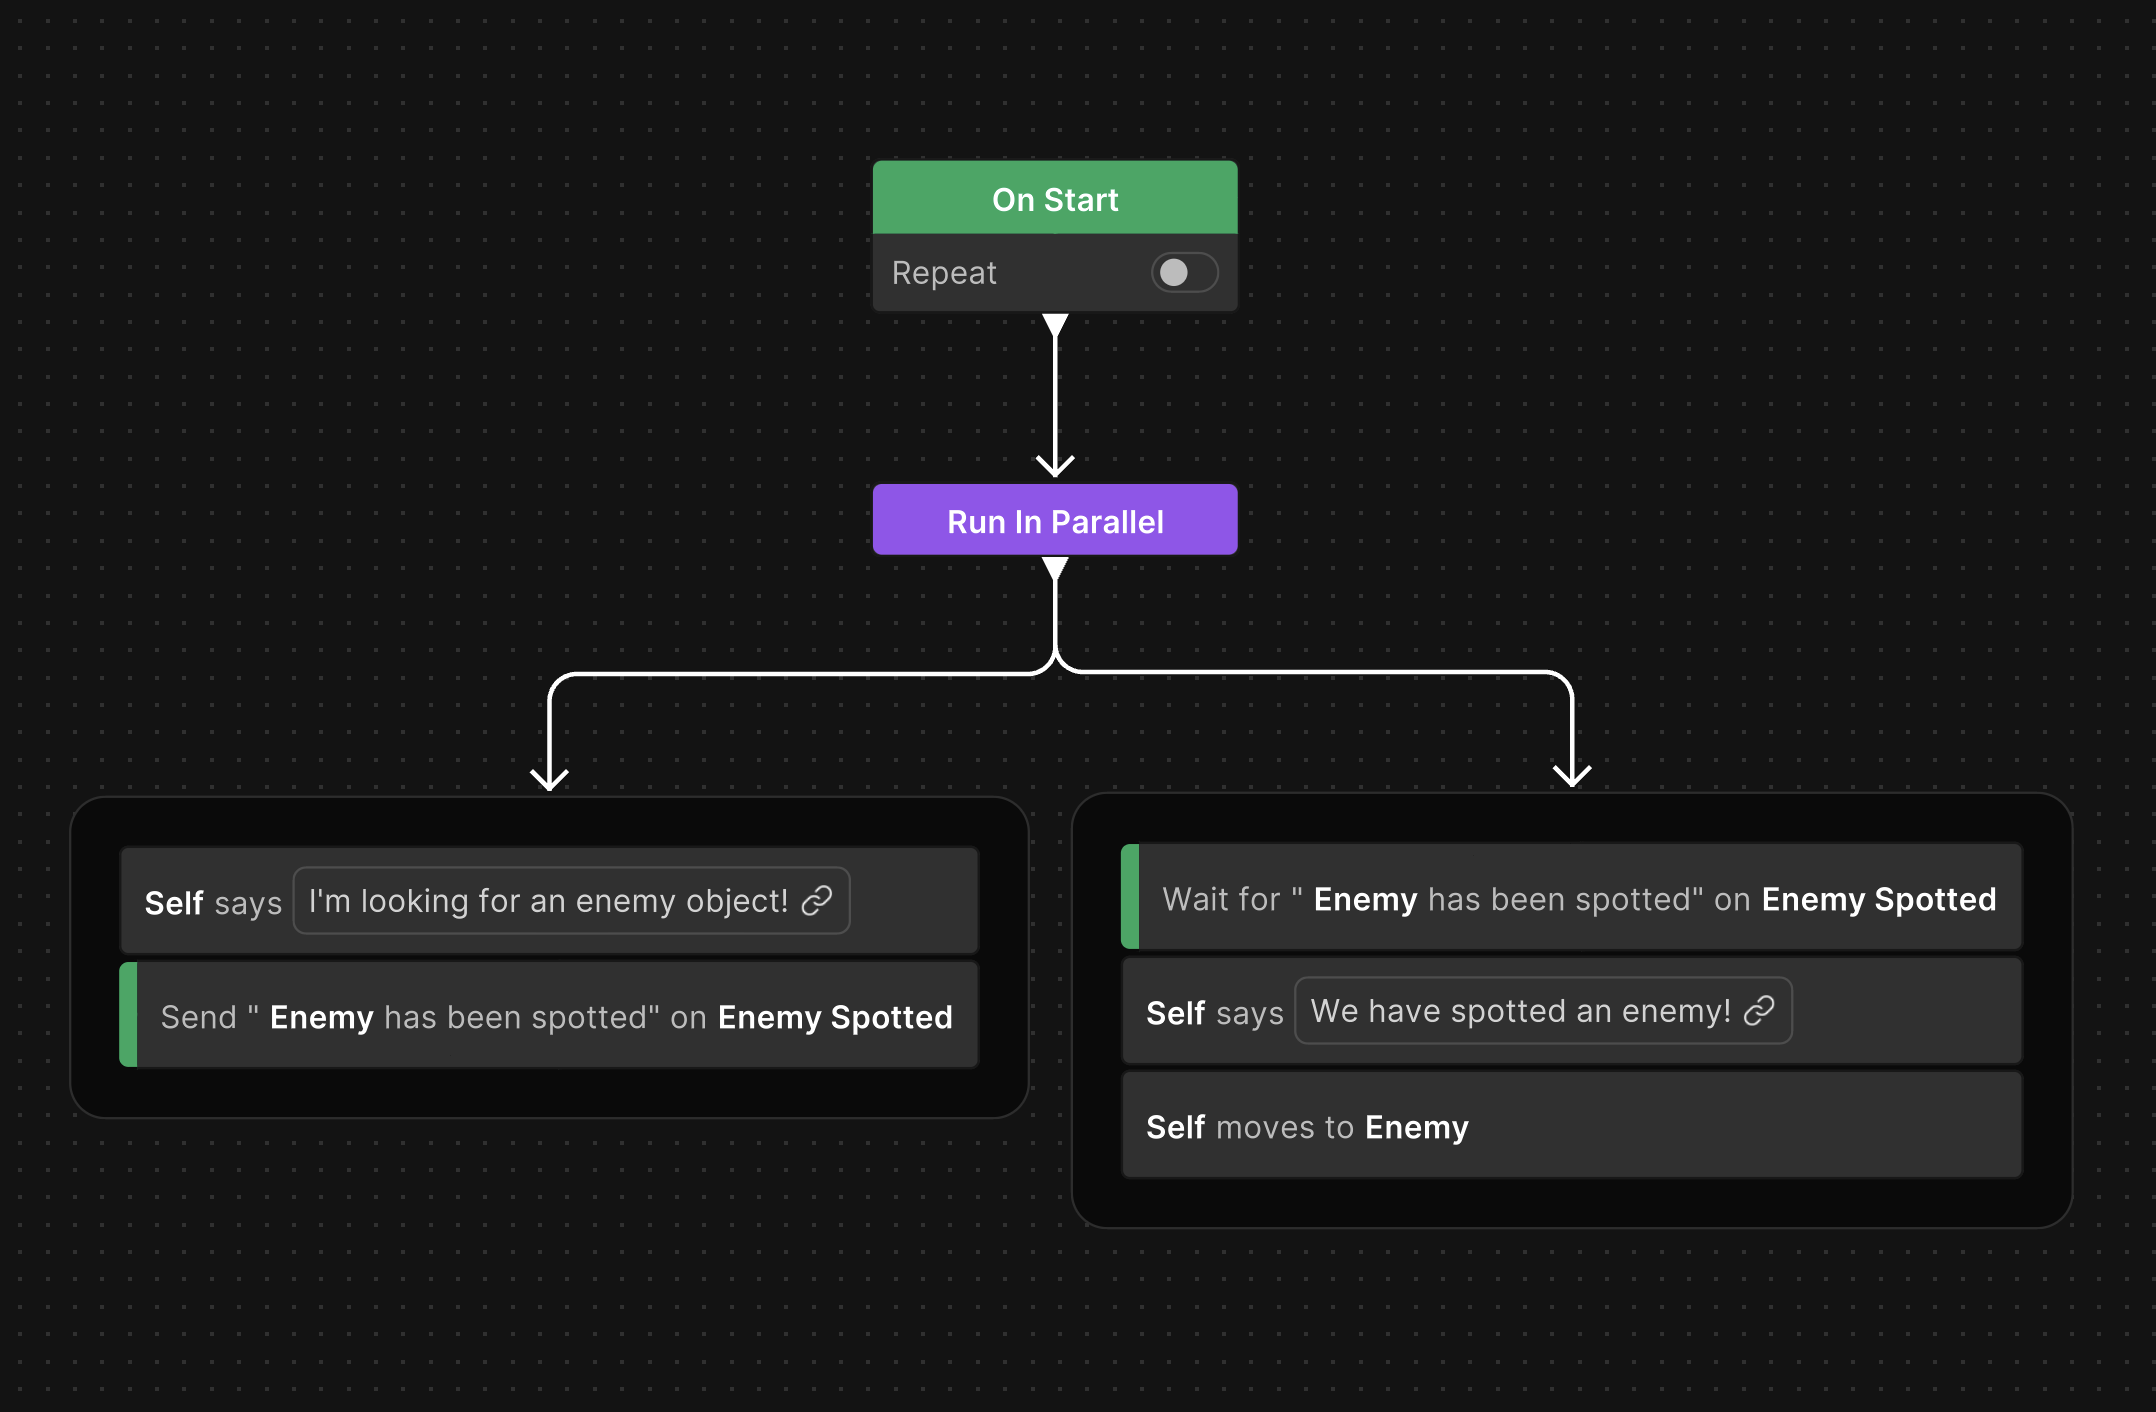
To finally send an event message on the channel you have just created, you can now add a Send Event Message action node to your graph. To receive a message, you should add a Wait for Event Message action, and assign both of them the same event channel variable to use. If you send any variables with your message, you can assign the received variables in the Wait node to be used. In addition, you could also start a graph from a “Start on Event” root node, which also waits and listens to an event. Here is a quick and really simple (although maybe not very realistic) example of how to set up the Send and Wait nodes:
Unfortunately at this time we still don’t support sending events between different graph assets as the Event Channel variables are specific to the Blackboards, so for now all event calls should happen inside the graph that is being edited. We’re planning to add this feature in a future update. 
Let me know if you need anything more to get started, or if you have any additional feedback on the tool!