Question for the hardcore gurus - Mesh.CombineMeshes and mergeSubMeshes parameter

I’ve noticed that when merging meshes that contain submeshes the following happens :

  1. When mergeSubMeshes parameter is set to FALSE, I need to specify the same amount of materials as there are submeshes. This makes sense to me since each submesh will be renderer using its own material.

  2. When mergeSubMeshes parameter is set to TRUE, I can specify one and ONLY ONE material; adding more materials is meaningless. This also makes sense to me since the mesh is now only one mesh, and therefore it will need one material.

Please correct me if I am wrong in any of my assumptions so far as it’s important to me that I understand this basic foundation piece well.

Assuming I was correct, I have a problem with scenario number 2. The problem is that I have a mesh that contains submeshes, and one submesh uses a “Diffuse” shader and all the others use “Bumped Diffuse” shaders. I am attempting to combine all the submeshes into one mesh in order to increase performance, but that is only one side of the equation. The other side is to use as few materials as possible; in this case, the minimum number of materials needed is two : one “Diffuse” material for that one submesh, and one “Bumped Diffuse” material with atlas for all the other submeshes. I’ve done all this, but now I realize that I’m stuck… I can’t seem to get scenario number 2 to work with 2 materials, and from my experiments so far it seems that it will never work, I can only use one material.

Would someone please confirm that what I have said so far is true? If so, what’s the alternative?

Since I’m stuck, I decided to fool around, and I changed the mergeSubMeshes parameter to false (one material for each submesh) and what I did was I filled the materials array with one Diffuse material and filled the rest of the array with references to the same “Bumped Diffuse” material w/atlas, and it worked, but the draw-call count was the same; no improvement whatsoever, I might as well have left my mesh the way it was without any atlases.

So it seems to me that if you have a mesh with several submeshes, every submesh material needs to have the exact same shader or else you can never set mergeSubMeshes to true and merge them into one mesh.

Hm? I have lots of meshes in unity with more than one material. It would make no sense to have limit one mesh one material.

I assume this is because your mesh is not truly one mesh and contains several submeshes, each associated with a different material.

When using multiple materials for one mesh, unity considers each material as submesh, but in reality these are just polygons with different material ID. But it is still imported as single mesh, without chance to delete submeshes (when put in scene) like “true submeshes” (or at least what I am calling submeshes).

I dont know why it works like this, if this is my terminology misunderstanding, or what is going on. But there are two levels for sure. First level are “deletable submeshes” (“real” parts/objects of model from the point of view of 3d modelling app) and one level deeper are submeshes counted by unity on mesh object. These submehes have nothing to do with elements of model parts, but they are probably generated according to material ID.

Ok, let’s say we create a mesh and assign it two materials. How does the renderer know which material to use, and how does it know where to use them? Mesh uvs only store rect[ ] array of vectors pertaining to one material only, otherwise how would you associate uvs to textures across multiple materials?

Okay, I figured it out and confirmed my own findings with one small caveat to scenario #2; multiple materials on one mesh (one sub-mesh) are not meaningless like I thought they were; they will simply render (or should I say blend) the different shaders on the same mesh, one after the other. This is, however, not the best approach for people who want to blend different shader effects; it would be much better to write one shader that did it all instead of using multiple shaders on the same mesh.

So I’ve confirmed the following : submeshes on a mesh allow for a mesh to contain several materials, each of which is assigned to a respective submesh. This is how a mesh can contain several materials and assign them to different parts (ie. submeshes) of a mesh. I will do a writeup on my blog later on and post the link here.

I’ve also solved the problem I was having of not being able to reduce the materials to a minimum after merging the submeshes using parameter mergeSubMeshes = true; turns out I’m not supposed to, I should use false instead, keeping them as separate submeshes. Then I take all the “bumped diffuse” related sub-meshes and combine them into one (via get/set triangles ) and adjust subMeshCount to 2. Now the renderer knows that the first submesh is to render with the first material (diffuse) and the second (merged) submesh is to render with the second material (bumped diffuse atlas). Works like a charm!

1 Like

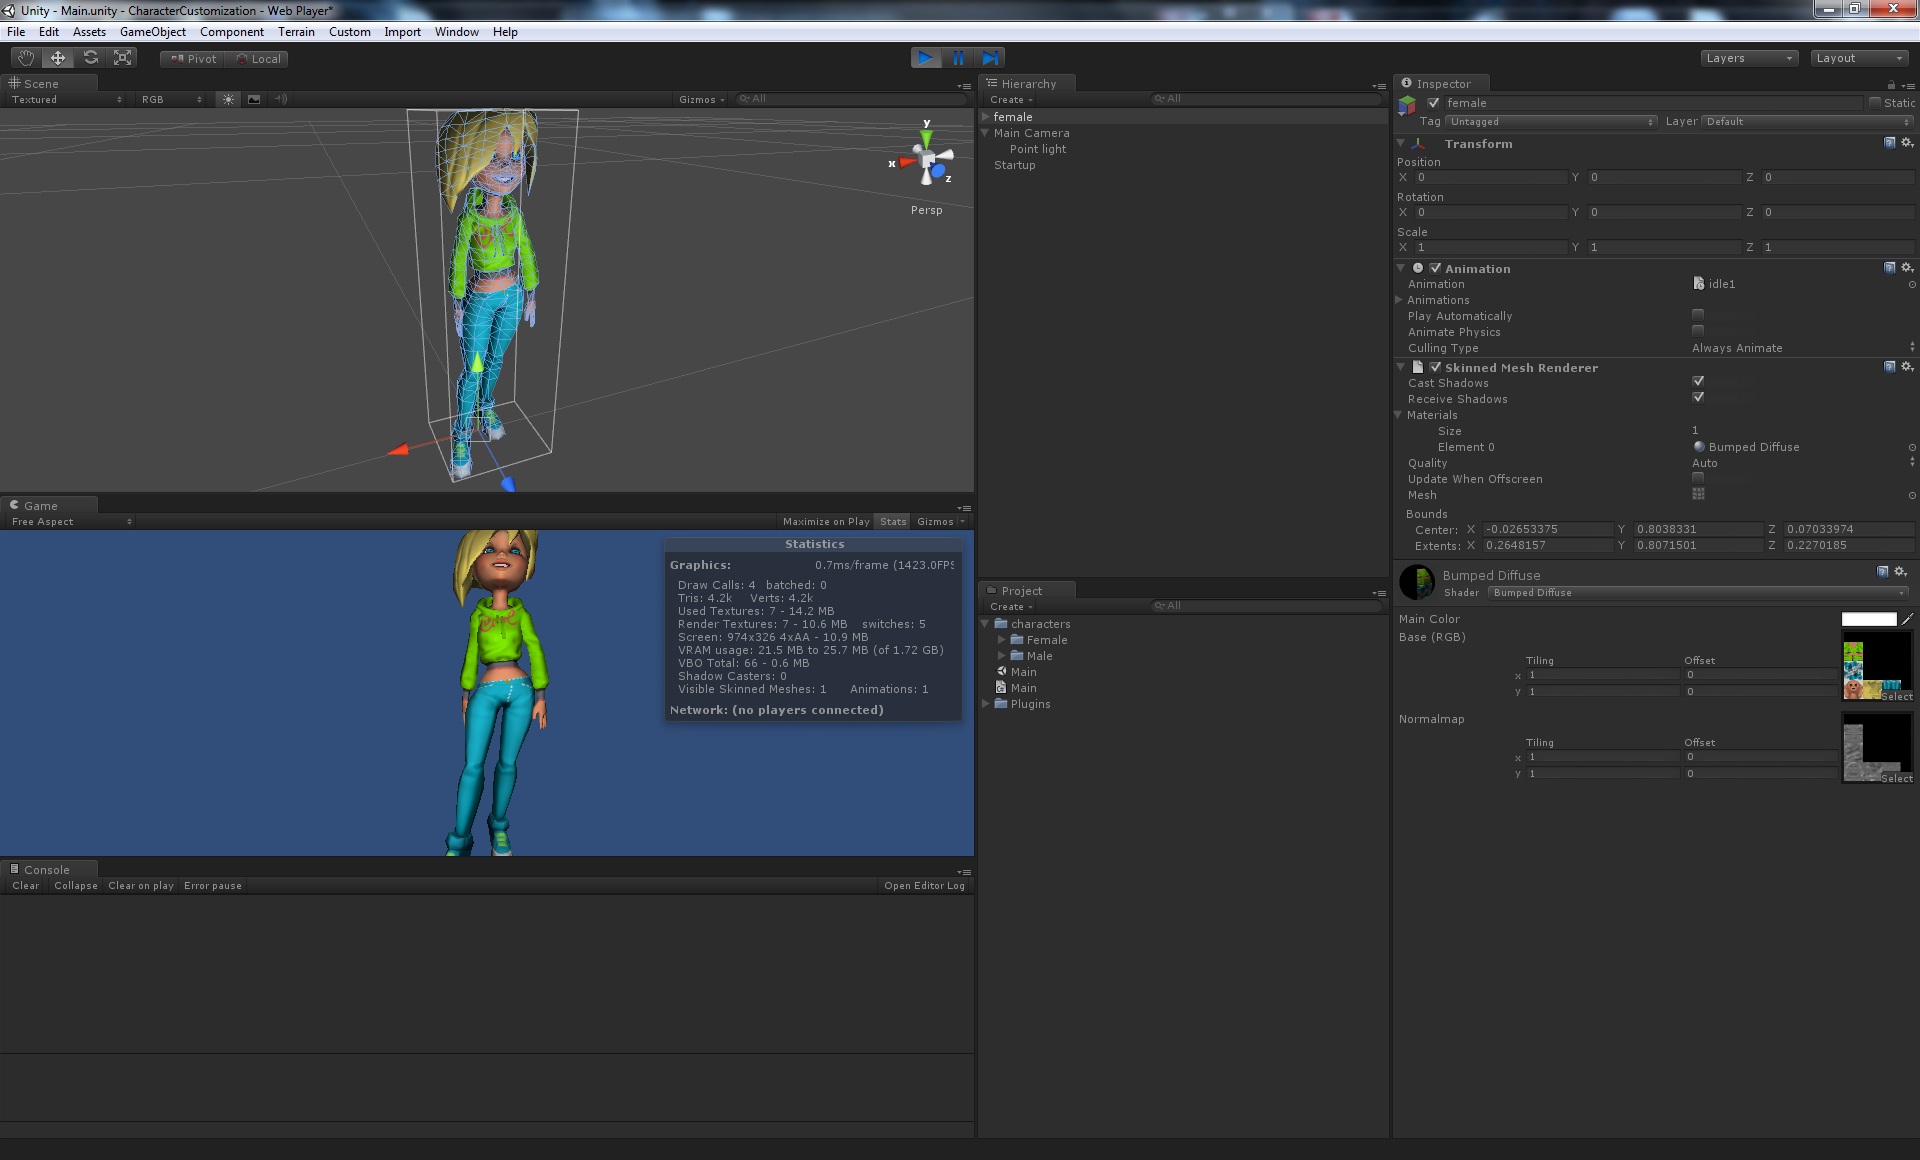
Okay, so I got everything working. I am now able to take any Skinned model and optimize both it’s meshes (by combining them) and Materials (by creating atlases for each shader type), and these are done automatically by a script I wrote, which I will be incorporating into a Skin package that I plan to place in the Asset Store. Basically it’s a complete rewrite of the character import and dynamic generation routines used as inspiration from the Character Customimzation demo with major enhancements that make importing and generating Skinned models child’s play. The end result is a skinned mesh generated dynamically at run-time that is optimized as I mentioned previously. I was able to apply my routine to the sample female model from the Unity demo and these are the before and after screenshots :

Before (merged meshes, but multiple materials - no atlas) 14 Draw Calls :

After part I (merged meshes and minimal materials w/ atlas) 6 Draw Calls :

After part II (merged meshes and only 1 material w/ atlas) 4 Draw Calls :

In the before image, the meshes have been merged but no material optimization was done, leading to 14 draw calls per character.

In the after image (part I), both meshes and materials have been merged, but since the eyes was the only body part that used a Diffuse shader (unlike the rest that used Bumped Diffuse), it could only reduce the material count from 6 to 2 (one for Diffuse, one for Bumped Diffuse). Still, the draw call count has been more than halved from 14 to 6 per character.

In the after image (part II), both meshes and materials have been merged just like in part I, but this time I gave the eyes a normal map so that it could use the same Bumped Diffuse shader as all the other parts, and now it was able to reduce the material count from 6 to 1, and the draw call count fell from 14 to 4 per character.

BTW, don’t look at the fps number since that is constantly fluctuating, but realize that of course the fps increases as you decrease the draw calls.

Morale of the story : combine both your meshes and your materials and divy up your sub-meshes wisely!

This looks really good, such package is really missing in Unity. How fast is this automatical atlasing? There is for sure no problem to do this with one character, but what about 50 charaters? You are joining textures on the fly to atlas? I would guess, that is still far faster to make atlases “by hand” and dont use this automatical autoatlasing feature. I save probably few drawcalls, but it would probably be quite heavy to do this for 10 characters at once…Anyway how big can this atlas be? Is there 4096 unity limit?

Now that I finally got this to work, I’m going to optimize the c# code as much as possible and measure how fast it is; currently the debug build is at about 125ms to generate a character from scratch. The atlas generation is done on the fly since it pretty much guarantees that everything will fit in as few materials as possible. When you create atlases at design time you have no way of knowing the combination of body parts that will be used at runtime, so at runtime you will need to fetch the arm skin from one atlas, leg from another, head from another, etc… unless you’re lucky to have all the exact skins that you want in one; this leads to sub-optimal use of materials, which is why I generate on the fly. However, I am giving the flexibility to do it either way so that’s a moot point. As for atlas size, it’s whatever size you can specify in the Texture2D.PackTextures parameter “maximumAtlasSize”; I have it so you can plug in your own value, now whether it will work on your specific device is another matter.

Indeed. But this can be easily solved by Amplify (when atlasing feature ready). Anyway I really like idea of some universal character system, anybody has to develope it by himself, so if universal enough, it can be HUGE timesaver for lots of people. Dont forget on mounting points (for weapons, shield, etc…).

How does your building works? You have separate bodyparts, equip etc each as individual mesh rigged on same skeleton and then stitching on the fly to one skinned mesh? How do you store animations? As @anim?

Steps are :

  1. Create skinned mesh in your modeling tool and name parts according to my naming scheme. For example, if you have one head you can just call it ‘head’, but if you have two you can call them ‘head_Nude’ and ‘head_HelmOfValor’. Also, if your game doesn’t require swapping different body parts, for example let’s say your character mesh is one big mesh and you have several skins for him, then this system supports that as well.
  2. Artist creates textures for mesh and names them according to my naming scheme. For example, if the artist is painting the head and knows that it’s a Bumped Diffuse texture and requires a bump map, then he would name two textures according to my naming scheme so that the importer knows to match it against the head and create a Bumped Diffuse material and assigns both textures to it. The naming scheme is pretty flexible in that it allows you to have, for example, just one head mesh and you can create as many “skins” for that head as you want by naming the textures appropriately. Or you can have several head meshes and as many “skins” as you want per head. This means that this process is entirely automated; no need to manually do anything.
  3. Import model into unity - you can put all animations in one model or separate them into individual @anim files, whatever works for you, doesn’t matter.
  4. Put all textures into “textures” folder.
  5. Click on character, or multiple characters, or root folder
  6. Click on my character generation routine in the menu
    This will generate all the materials and skins for each character and body part; currently this requires Asset Bundles but I am looking into ways to make it work without it (most likely after I release it).
  7. Now at runtime you create my custom class (I call it CharacterWardrobe right now) and you tell it the name of the model you want (in this case “female”) and feed it the name of the skins you want it to wear :

CharacterWardrobe ninjaWardrobe = new CharacterWardrobe(“female”);
ninjaWardrobe.WearItem(“hands”, “GlovesOfDexterity”)
ninjaWardrobe.WearItem(“feet”, “BootsOfSwiftness”)

ninjaModel = ninjaWardrobe.Generate();

// do whatever you want with ninjaModel

The Generate routine is the one that gets all the body parts and stitches them together and does the shader merging/submesh merging/atlasing (which is optional). The shader merge is flexible in that you can use any shader, including your own custom shaders if you choose. It doesn’t interrupt any animations either so you can switch body parts and animations will continue uninterrupted.

This system took me many many months believe it or not, simply because it’s very hard to find the information I needed from the forums. If I had the necessary documentation then I would have created this much much faster, but alas… the forums/documentation leaves much to be desired :frowning:

I’m looking into this amplify system; very interesting! But there must still be a performance cost with the virtual atlas approach since it can’t all be in memory at the same time, so it probably has to do a lot of loading all the time. I’m going to check this out very closely as it could compliment my system nicely!