Making Normal Maps work on both sides of a 2D sprite in 3D space

I am creating a sprite based game in 3D space (like Hollow Knight did it). I want to use normal maps for my sprites and am using Shader Graph with the URP (3D) for this.

Since I have 2D sprites, in most instances I want them to be lit up from any light source that is close by, no matter whether it is somewhat behind or in front of the sprite. Normal maps however include the Z component as blue color. That means that my sprite will NOT get lit up if the normal map determines that I am lighting the backside of the sprite rather than the front. X and Y (R and G) ignore that of course, still lighting up the sprite regardless of what Z coordinate the light is shining from. The result is what you see in the images I attached. No possible blue value has given me the desired result. It ranges from: “Light up backside” to “Fully dark” to “Light up frontside”, but no “Light up both”.

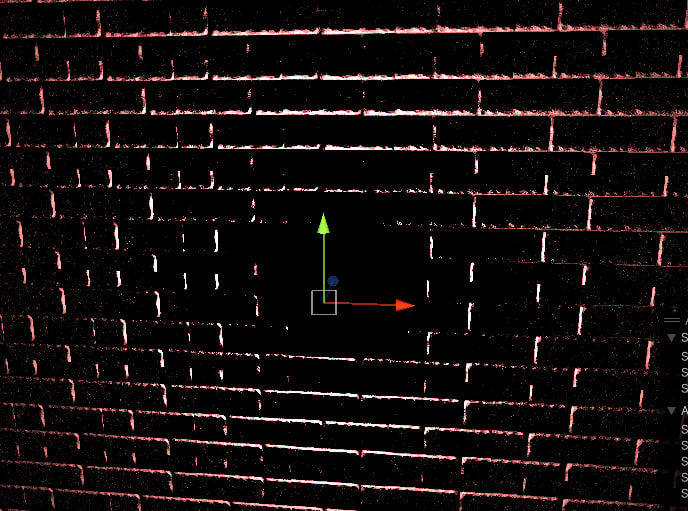
Here is what it looks like when the lightsource is in front. It’s what you would expect a normal map to look like:

Here is what it looks like when the lightsource is behind the sprite. Only X and Y values are working now, while the Z values are completely dark.
This is the shader graph I used for this:
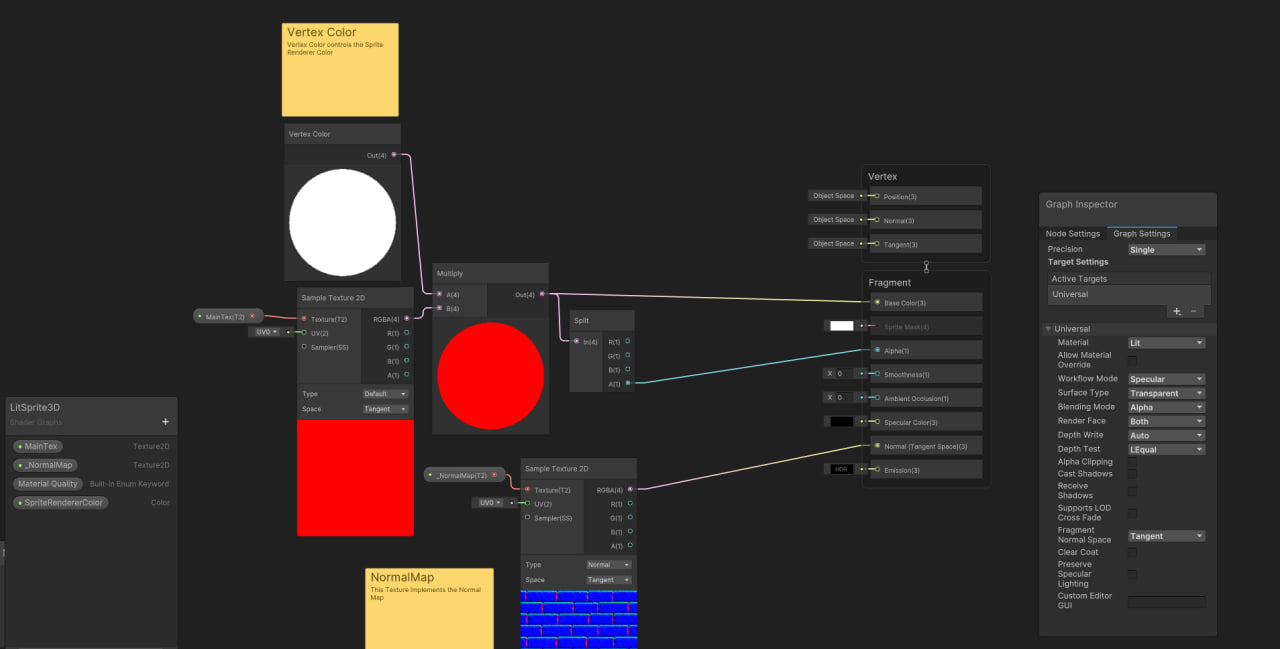
I want the normal map to be treated equally, regardless of whether the lightsource is in front of behind the sprite.

I figured I could just slightly modify the code of whatever interprets normal maps to think that light is always in front of an object, only caring about the absolute distance…but I after generating code for the shader and seeing an incredibly large amount of seemingly repeating lines of code, I quickly got discouraged. Not that I was able to make any sense of it to begin with.

For sprite-based games in 3D space that use normal maps, this seems like it should be a fairly common problem, yet I could not find anyone talking about it even after many…many hours of google and discord searches. Maybe I have missed something obvious? I am feeling pretty desperate regardless. Any help would be greatly appreciated!
Use an Is Front Face node, and multiply the (B) of the normal vector by -1 if Is Front Face is false.

Thanks a lot for the reply! I have tried it out and unfortunately this is not what I was looking for. I am sorry if I was unclear. Is Front Face evaluates whether I am looking at a backside or a frontside. This makes it so that I can always render the normal map of something from one Z direction (from the foreground to the background, or from the background to the foreground), but never both at the same time.
I don’t think modifying the normal vector or the normal map values are going to do any good since neither of them can take a value that says “I will respond to both sides AT THE SAME TIME”.

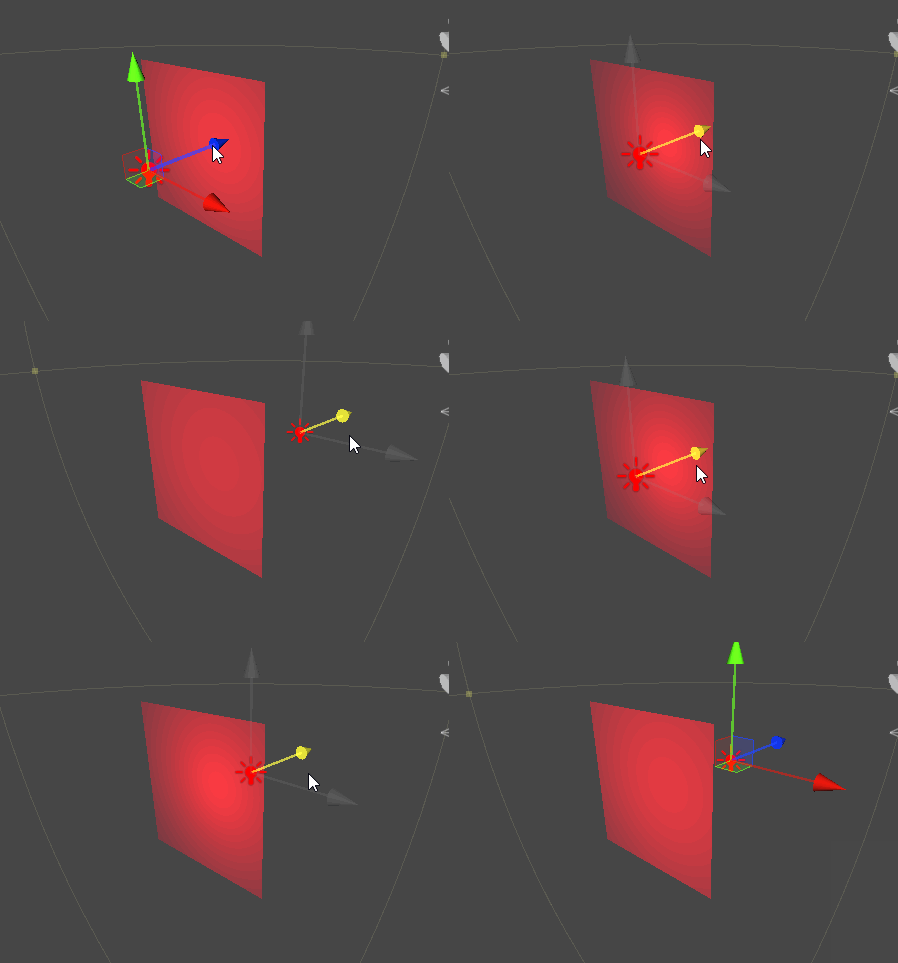
Imagine having two light sources, one in front of a sprite and the other one behind a sprite. Both should trigger the normal map the same way.

quick test in BiRP, modified sprite surface shader, with custom lighting (added “abs” into dot normal)
but not sure how to translate custom lighting into shadergraph…

9418106--1319528--2sidedsprite.gif

Yes, this is exactly what I was looking for! Well, almost. As you said, it’s not in shadergraph or the URP. But giving me the code gives me an idea of what I am looking for. I have no idea how to set up HLSL with Visual Studio or really how it works apart from general coding knowledge. But I am confident that I will get there with some online tutorials I have found on creating custom lighting with shadergraph. It will probably just take me a little while. I don’t think I need help for that. I will post the finished shader once I am done. If someone else wants to post a working shader for shadergraph in URP, be my guest.
Thanks a lot!

custom lighting seems to be possible somehow,

Hi again!
I found the time to get into some tutorials for URP and finally found something similar to what mgear edited.
In Universal RP/ShaderLibrary/Lighting.hlsl there is a code snippet that says

half3 LightingPhysicallyBased(BRDFData brdfData, BRDFData brdfDataClearCoat,
half3 lightColor, half3 lightDirectionWS, half lightAttenuation,
half3 normalWS, half3 viewDirectionWS,
half clearCoatMask, bool specularHighlightsOff)
{
half NdotL = saturate(dot(normalWS, lightDirectionWS));
half3 radiance = lightColor * (lightAttenuation * NdotL);

You can change the
half NdotL = saturate(dot(normalWS, lightDirectionWS));
to
half NdotL = saturate(abs(dot(normalWS, lightDirectionWS)));

and it will give you much of the same result that mgear had! You just need to link a copy of that file to your shadergraph file afterwards. Thanks a lot for the help, mgear!

I found a solution that I like even more, though I doubt that it is good practice.
I added

half3 lightDirectionWSNew = lightDirectionWS;
lightDirectionWSNew.z = -0.6;
half NdotL = saturate(dot(normalWS, lightDirectionWSNew));

I have no idea how this works, but somehow this specific z value gives the light a softer shine and it eliminates the normal map getting janky when it gets too close to a texture. Other than that, I haven’t spotted any differences.

8av59z

Here is a video of it in action. If you can’t see the video anymore, just imagine the first vid I posted, but actually working like in mgear’s .gif.

Thanks again for the help!

Hi, I am trying to achieve the exact same thing but am very much a noob with shaders. Could you help me to learn how would I go to implement that snippet of code you made in my own shaders?

check these tutorials, theres about custom lighting too

Thanks for the link, appreciate it. Looks like a lot of good info there but really overwhelming to me, not sure where to look there for what I need :S
I guess what I meant is more if someone could guide me somewhat to implement the changes Supernoxus mentioned. I edited the hlsl but getting a “TVAL_ID error expecting TOK_SHADER” and then not sure how to “link a copy of that file to your shadergraph file”.

Hello tarabout!
I don’t think I can guide you through this without a detailed description of what is not working for you exactly, but here goes…

I have no idea what the errors mean, but adding an “abs” to value really should not bring up an error.
Are you sure you edited the file correctly?
Furthermore, if you edited the file, then you must save the Lighting.hlsl file seperately or something bad will happen, as far as I remember. I am surprised it let you edit it and save it at all, to be honest! I saved mine in the same folder as my shaders because it makes linking them together later easier.

In order to link a shader to your new Lighting.hlsl file, you must generate the shader first. When you open up a Shader in ShaderGraph, you should have an option in the inspector at the very right, that says “View Generated Shader”. It opens up a whole bunch of code. In that code, press ctrl+F and look for “Lighting.hlsl”. It should have a long file path attached to it, like “#include “Packages/com.unity.render-pipelines.universal/ShaderLibrary/Lighting.hlsl””.
Save the generated shader wherever you have saved your new Lighting.hlsl. Then all you have to do is replace this long file path with “#include “Lighting.hlsl””. This will link it to the Lighting.hlsl file that is in the same folder as the shader you are editing. Keep in mind that there are several instances of this in the generated shader (8 for me) and you should edit all of them.

After that you attach the new shader file to your object and then it should work just fine.

Best of luck!

Hi, thanks for the super clear explanation. I was totally messing with the wrong stuff before thanks, haha, got no errors and easily did the changes. Thanks so much! :slight_smile:
Also holy molly, this is amazing. I had been trying various shaders and solutions since last Friday and this works great! <3

If it’s still not working for someone, it could be that the “View Generated Shader” is regenerating itself after saving. To work around this:

Make the changes "#include “Lighting.hlsl”” (Make sure that “Lighting.hlsl” is recognized as a string)

Copy all the code and put it in a new “code shader”. (Create → Shader → Unlit Shader)

Now add this new shader to your material.

Note: A better option for this would be to simply prevent the Shader Graph from regenerating itself.

@Supernoxus, you are my hero, I’ve been trying to do this for a few days and I thought it would be impossible. Love you <3