The Shader Graph team is excited to announce the new Custom Lighting Sample set - available in Unity 6.3. This set of samples shows how you can use Shader Graph to customize the lighting model in your project. By customizing the lighting model, you can:
- Improve the performance of the project by skipping some elements of the lighting. On low-end Android devices or XR platforms, you may want to leave out fog, reflections, specular, or other lighting elements to speed up rendering performance.
- Stylize the lighting to give your project a unique look. If you want your project to use toon shading, painterly rendering, or to change the appearance in other ways, you can use Shader Graph to control how light interacts with surfaces.
All of these things were possible to do in URP before, but now with this sample content, artists can achieve these things directly in Shader Graph without writing any code.
Getting Started
After importing the Custom Lighting Sample content (see below for instructions), open the Shader Graph Template Browser (also new in Unity 6.3!) by right clicking the Project window and selecting Create → Shader Graph → From Template…
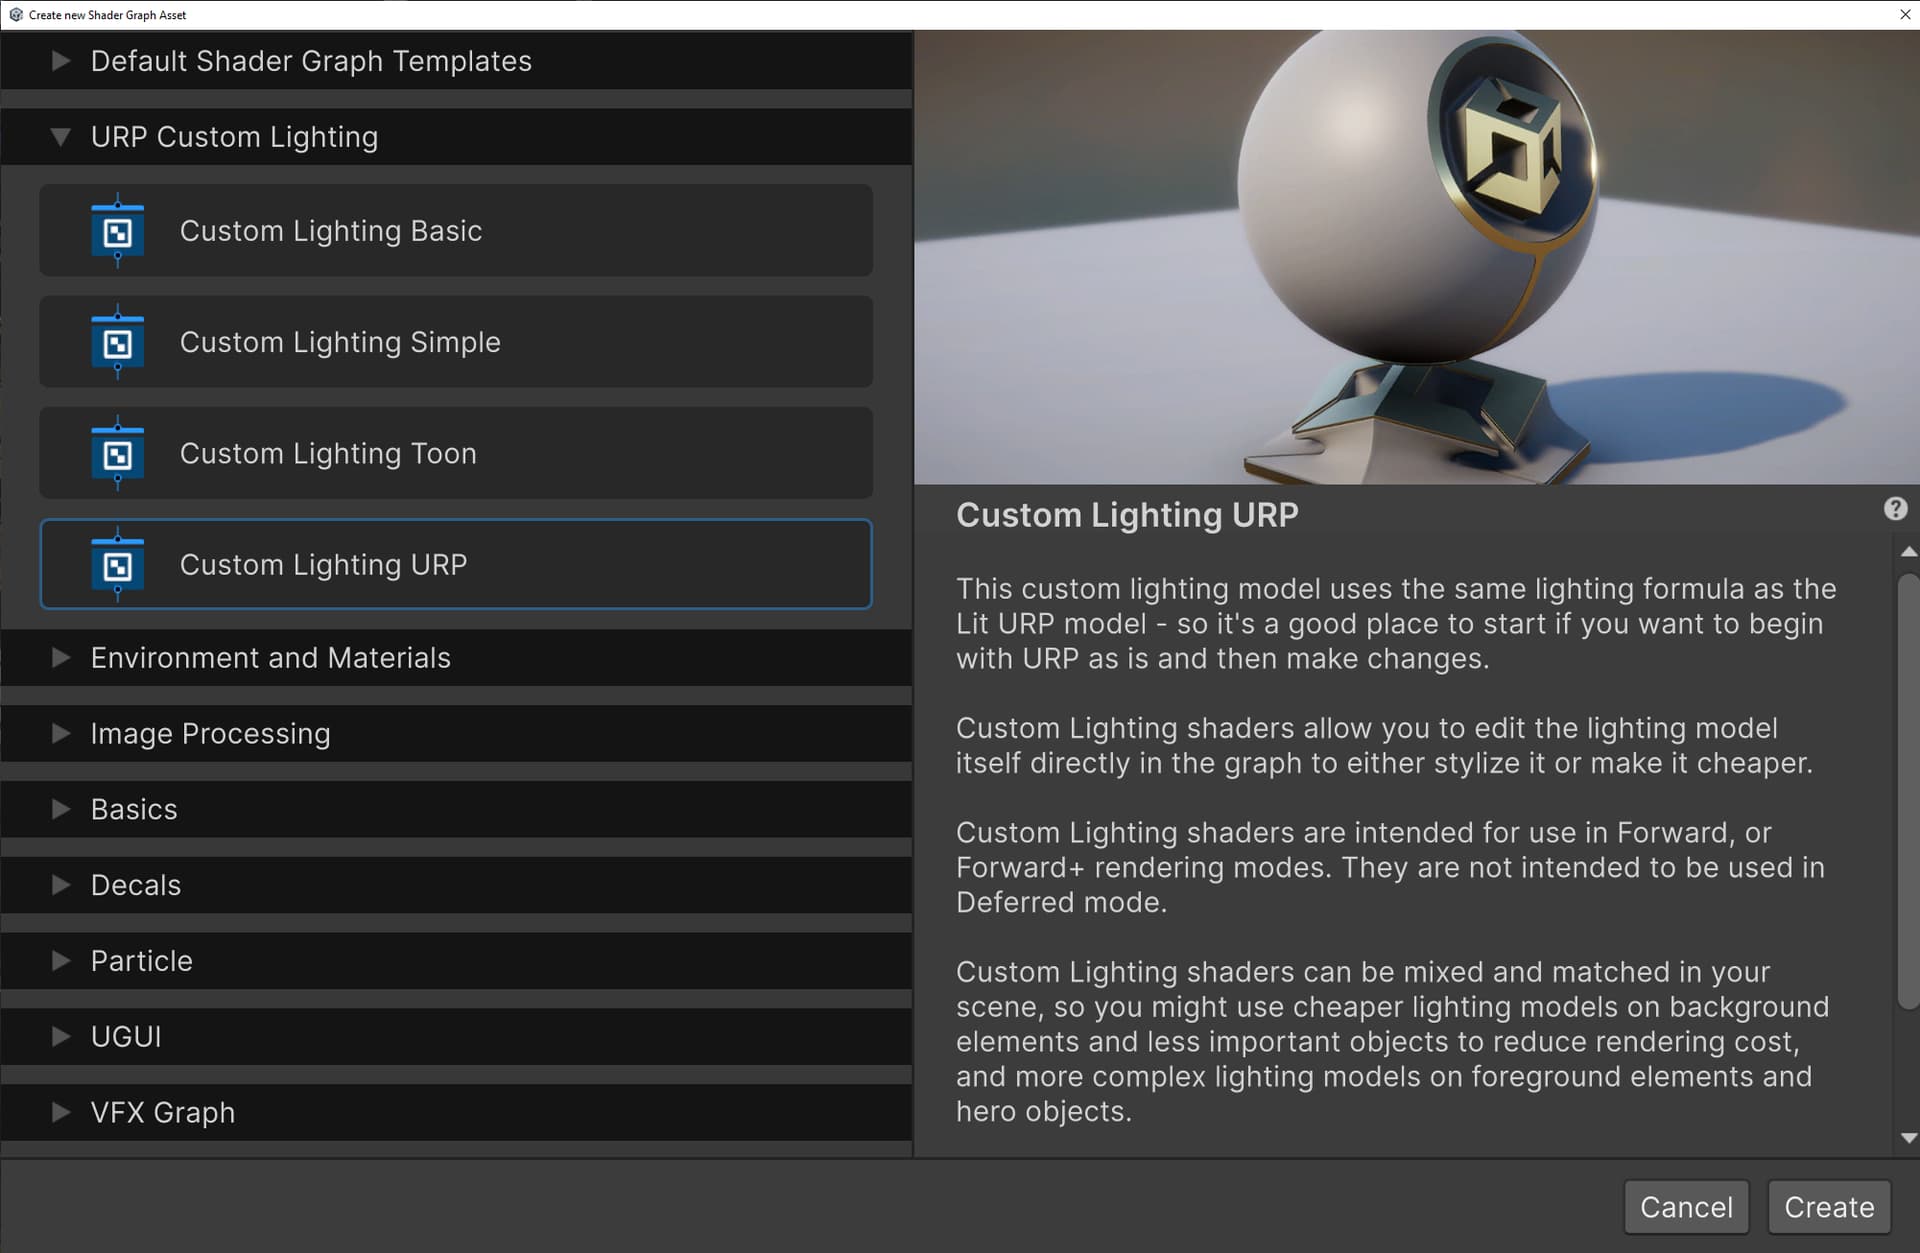
In the Template Browser, scroll down to the section called URP Custom Lighting. Here you’ll find 4 new templates:
- Custom Lighting Basic - a very simple lighting model. It does not support specular, reflectance, fog, or SSAO, but it does improve performance significantly over the existing URP lighting model and may be ideal for lower-end mobile devices and XR platforms.
- Custom Lighting Simple - a simplified lighting model that still provides most lighting features, but uses a cheaper Blinn formula to improve performance.
- Custom Lighting Toon - an example of how a toon shader can be created in Shader Graph. You can follow the example of what this shader is doing to achieve all kinds of unique lighting variations.
- Custom Lighting URP - this shader is a direct imitation of what the URP lighting model is already doing - but it’s re-created in Shader Graph so you can take it apart, use just the pieces you need, or add your own elements to what URP is already doing.
Select the Custom Lighting URP template and hit the Create button at the bottom of the window to use this template and create a new shader. This new shader you’ve created can be used as a replacement for the existing code version of the Lit shader - so if your project is already using that, you can select your materials and point them to this shader instead. This will enable you to go in and make changes.

How It Works
So double-click on the shader you just made to open it up in Shader Graph. First, open the Graph Inspector and notice that the shader is using the Unlit Material Target. In order to make the Unlit Target work better with Custom Lighting, we’ve added three new checkbox settings:

- Keep Lighting Variants - When this setting is on, it instructs Unity to include all of the Lighting keywords in the shader. Normally, these would not be included since it’s an Unlit shader, but this setting allows us to keep the keywords active - enabling the use of lighting subgraphs in the graph.
- Default Decal Blending - If your project is using the decal renderer component, decals are typically added to the shader under the hood. In the Unlit target, decals are added with no lighting. But this setting instructs Unity to not do any decal blending. This allows you to handle the decal blending yourself in the graph.
- Default SSAO - If your project is using the Screen Space Ambient Occlusion renderer component, SSAO is added to the shader under the hood. But this settings prevents that from happening - which allows you to add SSAO yourself in the graph instead if you choose. You can use it how you’d like (using the included Screen Space Ambient Occlusion subgraph) instead of depending on Unity to do it for you.
By turning on Keep Lighting Variants, and turning off Default Decal Blending and Default SSAO, we have an Unlit target that will work correctly with custom lighting.
Now notice that the Master Stack only has a Base Color as an input, but all of the standard material properties - Base Color, Normal, Metallic, Smoothness, etc, are connected to the Lit URP subgraph instead. This subgraph is doing all of the lighting directly in the graph and then passing the result to the Unlit Master Stack. So if you want to change the type of lighting that’s being used, you can just swap out this subgraph. It’s that easy! We’ll get to that in a minute.

First, let’s open the Lit URP subgraph and take a look inside. From left to right we see the following subgraph nodes:
- Apply Decals - this subgraph combines the material data of the decals in the scene with the material data in this shader. (If the decal renderer component is not present, this subgraph will not do anything and will not add to the performance cost.) This decal step needs to happen first before the lighting so that the decal data can receive the same lighting as the shader’s material data.
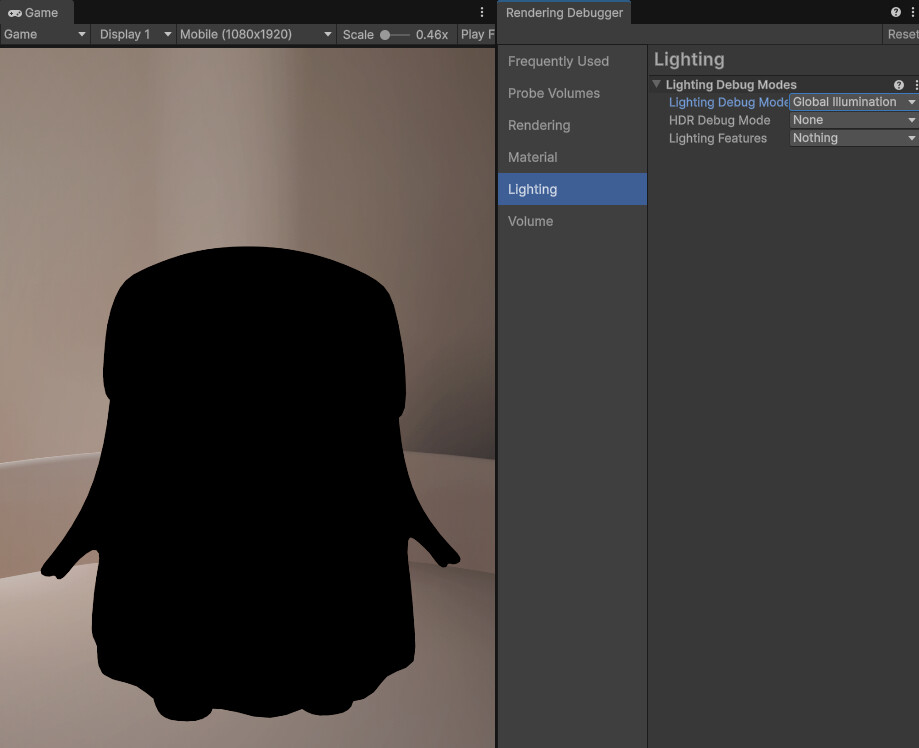
- Debug Lighting - this subgraph enables the debug lighting modes that are available in the Rendering Debugger window. Using these debug modes, you can switch your scene to display just lighting, just reflections, etc. When the debug views are not in use, this subgraph adds nothing to the cost of the shader.
- LightURP - this subgraph does the actual lighting. Inside, it contains subgraphs that do diffuse, specular, reflectance, ambient, and fog calculations.
- Debug Materials - this subgraph is similar to the Debug Lighting subgraph. It enables the debug material modes that are available in the Rendering Debugger window. Using the debug modes, you can switch your scene to display just color, just normal, just smoothness, etc. When the debug views are not in use, this subgraph adds nothing to the cost of the shader.

All of the sample lighting models consist of these four subgraphs. Each of them switches out the core lighting model node depending on the lighting model.
Finally, hit the spacebar to open the Create Node menu. Notice that the sample includes a LOT of new subgraphs in the Lighting category. There are lighting model subgraphs, but there are also lighting component subgraphs. There are multiple types of diffuse lighting, specular lighting, ambient lighting, and reflectance. There’s a node that brings in fog, a node that brings in screen space ambient occlusion, and a node that blends decals with your material data. All of these can be mixed and matched and used in unique ways to get just the look and performance balance that your project needs.

Improving Performance
So if we want to improve the performance of our scene, we can simply swap out the lighting subgraph that is being used for one that uses simplified lighting. In our case, we’ll open the shader we created and find the Lit URP subgraph. Hit the spacebar to open the Create Node menu. Open the Lighting->Light Models category. Select the Lit Basic subgraph and add it to your graph.
Now wire it up in place of the Lit URP subgraph. This will swap out the URP lighting with the basic lighting. In our testing, the Basic lighting is about half of the cost of URP lighting and may improve the overall performance of your scene by around 20% (depending on a lot of other factors of course.)

Keep in mind that in order to get these performance gains, you’re also giving up lighting features. The Lit Basic lighting model doesn’t have any specular, reflections, SSAO, or fog. So if you need some of these things, you may consider using the Lit Simple model instead. You’ll get less of a performance gain, but you’ll also get results that are closer to URP’s lit model.
Stylizing Your Rendering
Similar to how we improved performance, we can also stylize our lighting. If we swap out the Lit URP lighting subgraph with the Lit Colorize lighting subgraph, we’ll have black and white lighting everywhere - except where the scene is lit with the point or spot light. In those areas we’ll get color. If we swap it out for the Lit Toon subgraph, we’ll have lighting that is posterized to resemble a cartoon. And you can even duplicate those individual lighting models, open up your copy and change around the way they’re working to suit your project’s art direction. Shader Graph enables you to sculpt how light reacts with surfaces and define exactly what your final rendering will look like.

Limitations
There are some limitations to creating customized lighting models in Shader Graph:
- All of this only works in the Forward and Forward+ renderers of URP. If you’re URP’s Deferred render, or HDRP and you want to customize the lighting model, you’ll need to do that in shader code instead. This is because the lighting in deferred rendering happens in a separate pass that takes place under the hood and isn’t available to edit in Shader Graph.
- When supporting light sources other than the main light in your custom lighting model, you’ll need to write some HLSL code in the Custom Function node in Shader Graph to get that working. The sample already includes 5 variations of subgraph nodes that do this, so you can use these nodes directly if you don’t want to write code, or you can use these as examples to see how it’s done and then write your own based on these patterns. But code is required because the additional lights need a For Loop to process them, and it’s not possible to set up a For Loop in the node interface.
How To Import The Samples
In Unity 6.3, you can import the Custom Lighting sample by following these steps:
-
In the Editor, open Package Manager.
-
In the Package Manager window, select the Shader Graph package.
-
Select the Samples tab.
-
Finally, select the Import button to the right of the Custom Lighting sample to bring the new terrain shader sample set into your project.
With these steps completed, the Terrain Shaders sample will show up in your project under Assets/Samples/Shader Graph//Custom Lighting.
Conclusion
Using a customized lightning model - either to improve performance or to stylize the look of your project - is a great way to make it stand out from the crowd and make it memorable and unique. We hope this set of samples helps you learn how that can be done and shows you the huge amount of potential in Shader Graph. We would love to hear your feedback! Feel free to ask questions and tell us what you think here in this thread.