
This is the final tutorial in the UGS series. This tutorial shows you how to integrate ads using Unity LevelPlay. At this point in the series you have a foundation for economy resources and the players who have them, so the next step is figuring out rewarded ads.
Rewarded ads are optional ads where players can earn in-game rewards like coins or items. Since you’re granting rewards, you’ll use Cloud Code again for server-side validation and reward granting, to ensure that bad actors can’t cheat the system.
Where to find all of the content in the Unity Gaming Services tutorial series
The UGS series consists of 10 sets of tutorials, with each set comprising a video and written tutorial.
Video tutorials
The full video tutorial series will be here. We’ll add the video tutorials to this playlist throughout October.
Written tutorials
You’ll find links to all articles in this series as they become available in Part 1, the introduction post.
Demo project and scripts
You can find the Gem Hunter Match – Cloud Edition demo project in the GitHub page.
The scripts used in the tutorials can be downloaded here:
UGSTutorialSeries_Scripts.zip (1.6 MB)

Watch the video version of this tutorial here:

What is Unity Level Play?
If you already know how ad mediation works in a typical free-to-play game or app, feel free to skip ahead to the next chapter.
LevelPlay is an ad mediation platform. Think of ad mediation as like a real estate agent or auctioneer for your app’s ad space. Instead of you having to contact every ad network individually, LevelPlay shows your ad spots to all networks and automatically gets you the highest offer, just like an auction.
With LevelPlay, you use a single SDK integration to manage and optimize these multiple ad networks:
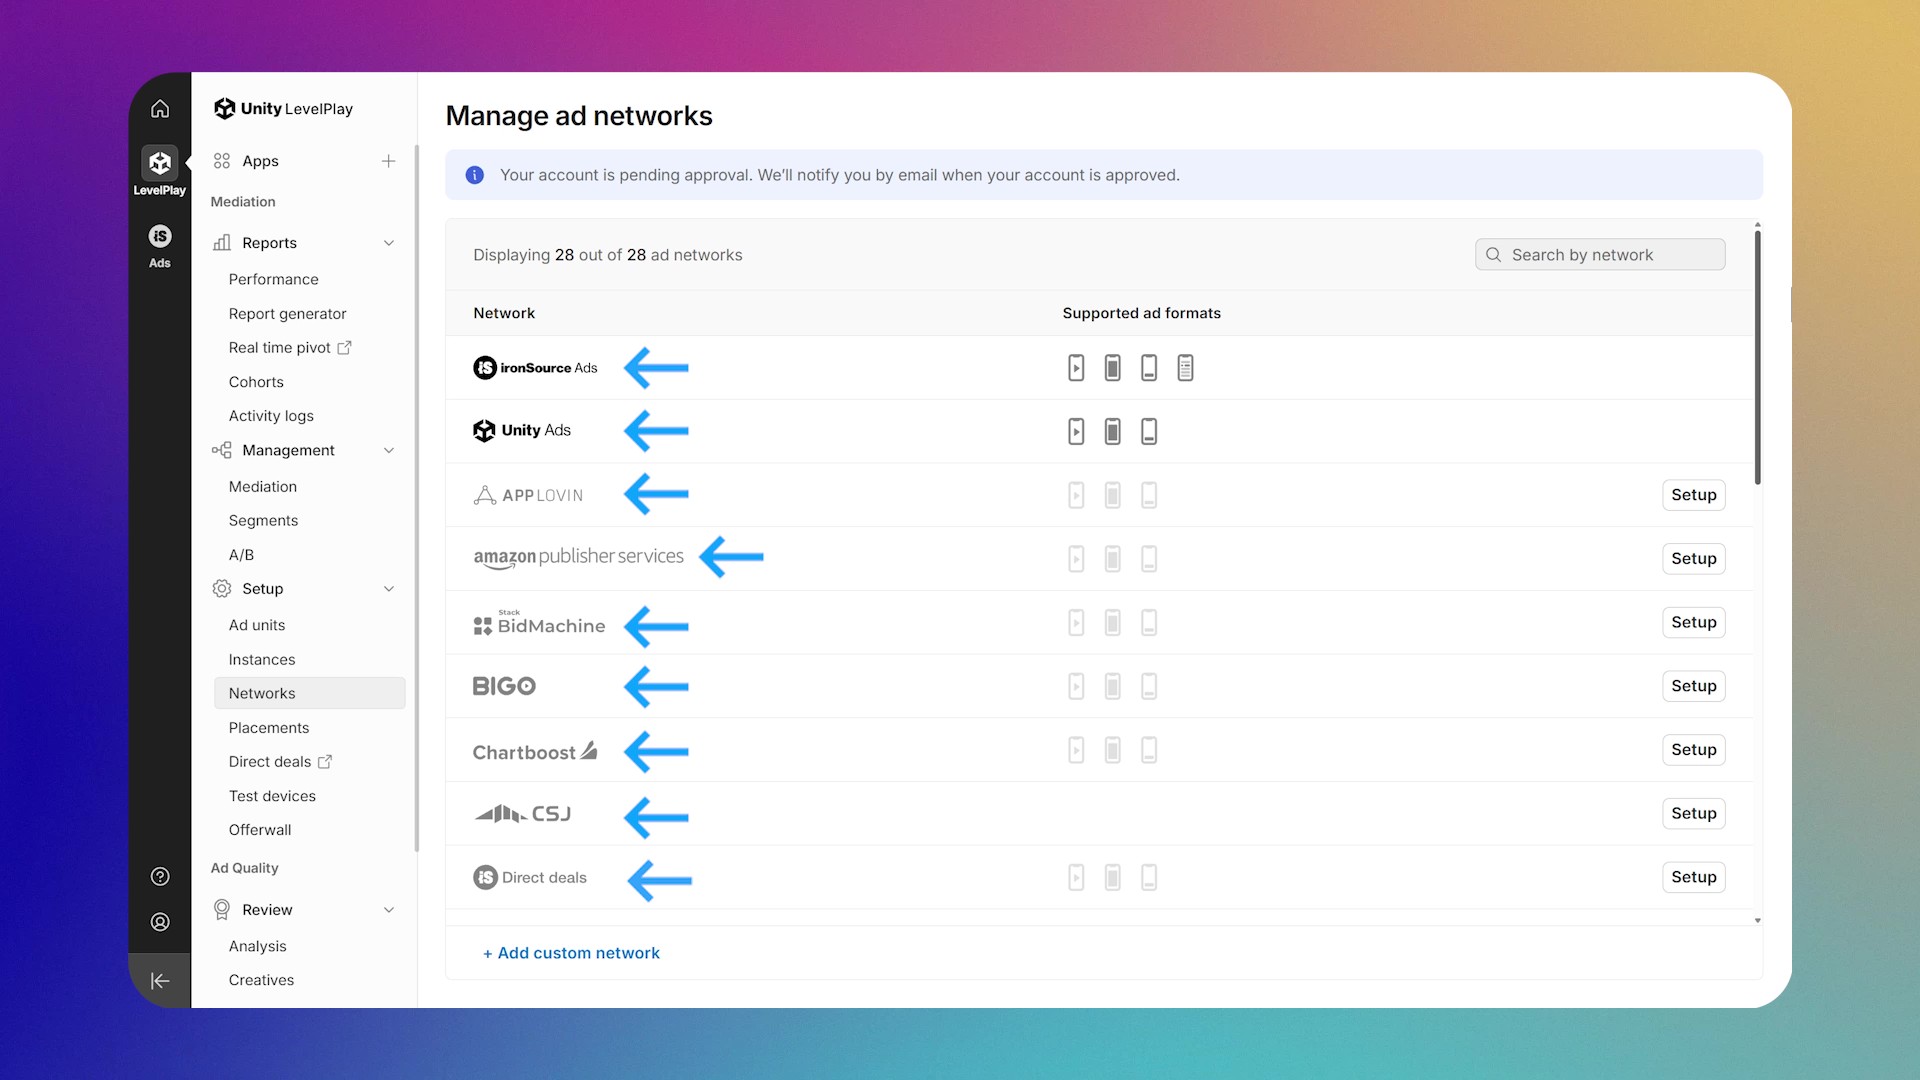
LevelPlay was originally developed by ironSource, and is built on the ironSource SDK. Unity and IronSource merged in 2022 and the API has since transitioned to LevelPlay.
Unity Ads and ironSource ads are individual ad networks, like Google AdMob or Meta. Unity LevelPlay, the mediation platform, manages all these networks and more, including Unity’s own ad network.
When you install the LevelPlay package, you’ll see, via the top menu Ads Mediation > Network Manager, that the LevelPlay SDK bundles the mediation with ironSource Ads and Unity Ads. And then below, you see all the other networks.
To reiterate: LevelPlay can show ads from Unity Ads and ironSource Ads; they are not the same thing, but are separate ad networks along with Google AdMob, Meta, Amazon Publisher Services, and many others, all of which compete in the auction process.
Set each of these up and LevelPlay will auction your ad space off to whoever pays the most for each impression.
Let’s start by setting up LevelPlay and installing the ads mediation package.
LevelPlay Setup
Go to your project in the Unity Dashboard, click on shortcuts, and select Unity LevelPlay, either by typing it in the search field or finding it in the drop-down menu.

Click sign in and you’ll be given the option to connect your Unity account or create an account. The sign in flow could change in the future but for now, if it’s your first time signing in you’ll automatically be sent to the app creation screen. If this doesn’t happen, just go to LevelPlay over on the top far-left corner and click on Apps. From here, click on the Add app button in the top-right corner of the window.
You’ll need to fill out the fields in the form. If you’re following along with the tutorial click the option App Not Live in the Application Store. Fill out the name, platform, and so on, and then click the Add App button.

Then you’ll get a screen where you can toggle ad units.

You can add all of them. Note that this flow might change in the future.
Once you do that, you’ll be taken to the Ad units window. Currently, when you add a new app the Ad units screen will be empty. Click the Create ad unit button in the top right corner and we’ll look at filling in the fields in the next section.

Ad units
Ad units are specific configurations of ad formats like rewarded video or interstitial. They define the monetization settings, rewards, and display parameters for ads in your app. These settings determine how ads are shown to users, as well as what type of ads are displayed.
If you watch the video version of this tutorial, you’ll see that two networks have been added for the Rewarded ad unity type, Unity Ads and ironSource Ads.
By clicking on an ad unit type you can access its settings. In the settings for the Rewarded ad unity, you can change your reward item name to the ID of the resource; in the tutorial, this is GOLD. Add a currency for now so that your code matches with that of the tutorial. Change the reward amount to 50.
In advanced settings you have some capping and pacing settings for limits on the number of ad impressions and timing of how often ads change.
The distinction between capping and pacing is that capping limits the number of ads you serve, and pacing limits the time interval between ads.
You can set the capping to something generous for now, like 30 per day. You can get things to work first and come back to test the limits.
You can also do per hour, but just do per day for now.

Go ahead and click Save. In the left-side menu, skip over Instances and Networks and go to Placements. In the Placements window, click on Create Placement in the top right.
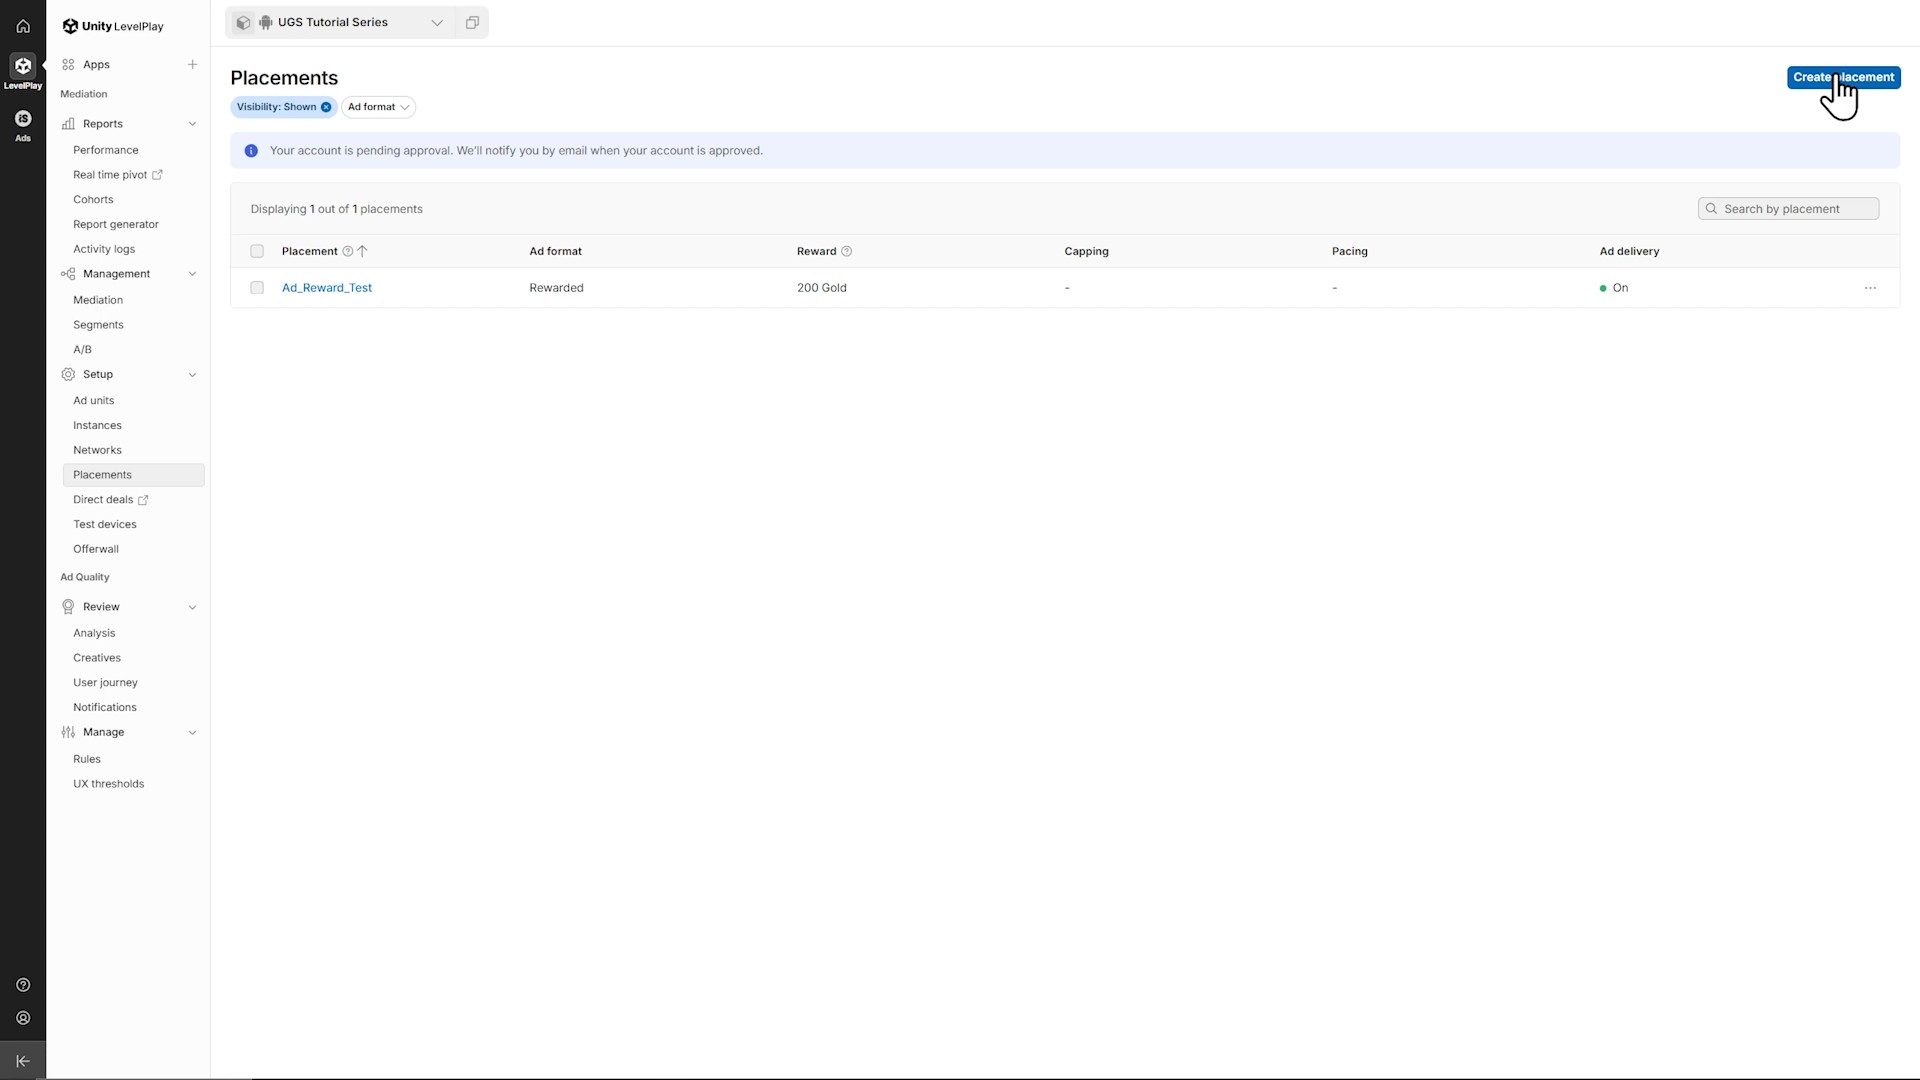
Placements
What’s the difference between ad units and placements?
Ad units define the basic configuration and default settings for an ad format, like the reward type and amount you just set up. Placements are placements of ad units. They enable you to control where and how the ad units are served within your app (i.e., end of level, store, etc.)
Placement configurations include a reward that will be used instead of the ad unit reward.
So, an example of an ad unit might be a rewarded video that gives 50 GOLD by default, whereas an example of a placement could be that when the same ad unit is shown in a placement on the “Game Over” screen, the player gets an extra life instead.
For interstitial ads, placements are important for adjusting the capping of how often players see ads; you can adjust them to where it feels fair.
In banner ads, placements are useful for reporting. That data could be helpful for UX issues, e.g., if you see a spike in banner usage in a certain placement, it might indicate a problem with a banner blocking something players want to click on.
Create a placement
If you’re following along with the video version of this tutorial, you’ll see that for the Placement name field, there are some predetermined names in the drop-down list. Choose Main_Menu.
Set the reward to 100 GOLD so that you can see that the placement is working distinct from the unit. Set the capping to be the same as the ad unit. When you have different settings between an ad unit and a placement, the more restrictive one is chosen.

Next, go back to the Unity Editor and install the Ads Mediation package from the Package Manager window. Under the Samples tab, import the Unity LevelPlay Sample. In this tutorial you will build yours from scratch but it’s smart to check out the sample as there will be updates.
RewardedAdsManager
Create a new script called RewardedAdsManager and open it. At the top, define platform-specific app keys. The app keys identify your app to the ad networks. It’s on the apps page of the LevelPlay dashboard just under the app name.

You can also bring over the AdUnitId and the PlacementName for the ad.
You’ll want to do a cooldown on ad completion. For example, you might have a user who wants to get all the ad rewards they can, up to the cap you set. By setting up a short cooldown, you provide a short span of time to queue up the next ad and re-enable the watch ad button.
Check that the LevelPlay SDK has been initialized and after that, you have the actual rewarded ad object from the LevelPlay SDK.
You can store the last generated token to easily prevent duplicate usage and track when the last ad was completed for UI cooldowns. It’s a good idea to just do this locally even though you’ll have caps for ads too.
There are a couple events; for successful completion (AdSuccessfullyCompleted) and, in addition to the bool, you should eventually pass the reward to give a notification for the player.
Finally, there’s an AdAvailable event which can be used to toggle buttons or disable things if there is no network connection.

Initialization
You’re going to wait for authentication and only initialize ads after the player has signed in. This is due to you using the Player ID in the LevelPlay initialization in order to have good tracking data.
Just in case you miss the sign-in event – which is likely to happen if you move this code into another menu or scene away from where the sign in would be triggered – you can directly check if the player is signed in and if LevelPlay is not initialized, you can call InitializeAds.

You’ll then get the correct AppKey for Android or iOS. Initialize LevelPlay with the AppKey, and the userID. In this tutorial, LevelPlay.SetPauseGame(true) is also included, which means the game will be paused when there is an ad, and things will resume automatically when the ad is closed. This should only be called once in a session, so do it here.
The test suite enables you to set and test your app’s integration and review the platform’s setup and ads related to your configured networks. To use the test suite, enable is_test_suite with SetMetaData before initializing.

After the SDK is initialized, you set the initialized flag, log a message, and create a RewardedAd object, register for events, and load the rewarded ad. When you create the ad, you send the AdUnitID and you’ll send the placement ID when you show the ad.

Event-driven architecture
LevelPlayRewardedAd provides many events you can subscribe to. In this tutorial you can subscribe to all of them. Some of the methods don’t do that much, but this way we can see what’s available. Most of your logic is in ProcessAdReward.
ClickShowAdReward
When the player presses the button to watch an ad, the button calls the ClickShowAdReward method. The method performs availability checks before attempting to show the ad.
ShowRewardedAd handles whether you’re showing a placement or basic ad unit. If no placement is configured, call ShowAd; if you have a placement then you would call ShowAd with a placement name.

CanShowAd verifies all necessary conditions like whether the SDK is initialized, the ad object is created, the ad is ready, and if you’re under the placement capping.

Finally, the cooldown is straight forward; your GetRemainingCooldownSeconds can be used for a countdown timer to give some wiggle room to load the next ad if you want to allow players to earn ad rewards back to back.
Event Callbacks
Let’s look at the event callbacks:
HandleAdLoadedSuccessfully: You have a log and could fire off the event to enable the watch ad button or any other notification an ad is available.
HandleAdLoadFailed: You have some retry strategies based on specific LevelPlay error codes. In the tutorial example below you’ll see the highlighted AdAvailable event for the error code for placement having reached its cap or limit.

Note that some error codes are specific to certain ad formats - check the the LevelPlay documentation on this because all of these apply to rewarded videos but might not apply to some others.
HandleAdDisplayed: You could have an event here to turn off the music or sound effects.
AdFailedToDisplay: In the example, AdSuccessfullyCompleted is used with false.
ProcessAdReward
ProcessAdReward: This is where you have logic for validation and reward granting.
If you’re also following along with the video tutorial then ignore the highlighted block as seen in the code example below and do a log for the ad reward granted successfully.

All that you should have left to do at this point is EventHandler cleanup in OnDestroy.
Testing in the Editor
Back in the Editor, put the RewardedAdsManager on an object in your scene, drag in the EconomyManager script for it to handle the economy update. And then your button click should be calling ClickShowAdReward.

And Remember that we’ve set up Rewarded Ads to require an authenticated player, so if you get an error related to that, you just need to bring your login buttons back to sign in anonymously again.
At this point in the series, you’re probably an authenticated player unless you’ve deleted the player in the dashboard.
After pressing start, you’ll see that you’re a returning player. So try it out and you should get logs for ad rewards.

Go back into your RewardedAdManager script, to ProcessAdReward, and let’s tackle the anti-cheating token. From there, you can handle the validation and reward granting in Cloud Code.
Token Validation
The principle to follow is that reads are safe, writes are dangerous. You can safely use the Economy service client-side to read player balances, inventory items, or any other cloud save data. But just like depositing a check at the bank, we need security and verification that what is written or rewarded to the player’s account is legitimate.
Anytime we use the economy service client side to write the rewards is a chance for a hacker to insert any data they want. So here, you can use Cloud Code. You’ll send the (adInfo, reward) to a GenerateAdToken method, and you’ll use this token in a Cloud Code function called HandleGrantVideoAdReward for validation.
You only grant the reward if the server confirms it’s legitimate from the token; this token is worth checking out to see what info you can get from LevelPlayAdInfo and LevelPlayReward.
As you’ve done before, you’re returning fresh economy data which means you’ll call the HandleEconomyUpdate in the EconomyManager and send the EconomyData along for everything else to update.
In GenerateAdToken, create a JSON token that includes the current timestamp, ad information, and reward data. This is hardcoded to GOLD so for now your Editor testing should work.

This token is not cryptographically secure and could be reverse-engineered. The real protection happens server-side in Cloud Code, where you’ll use this token information for rate limiting, such as setting 10 seconds between rewards, duplicate token prevention, timing validation, and hard caps on reward amounts.
Let’s implement this on the Cloud Code side.
Open up your Cloud Code solution and create a new class called AdRewardService. From here you’ll implement the Cloud Code function called HandleGrantVideoAdReward.
First, inside AdRewardsService, create a ParsedTokenData class to hold the extracted data from your ad token, which you’ll validate before granting a reward. At the top of the script you have token validation constants. Then, define the constructor to inject the services you’ll need. Use the PlayerDataService for saving the previous ad token and the EconomyService for granting the reward.
In the ModuleConfig, you’ll need to call AddSingleton passing PlayerDataService as the type parameter. This registers it with Unity’s dependency injection system, which tells Cloud Code to create one shared instance of PlayerDataService and reuse it whenever it’s needed.

HandleGrantVideoReward
Let’s look at the Cloud Code function. First, the raw token string is parsed into a structured object. The token contents and token usage are validated and a similar check is done on the timing as that on the previous cooldown. The last used token, which is saved, is also checked. Finally, the reward is granted using the EconomyService class.

In the ParsedTokenData method, the adToken is JSON format so you deserialize it using Newtonsoft.JSON and convert it into your ParsedTokenData object. If deserialization fails, you catch the exception and throw an UnauthorizedAccessException.

And then you have your method for validating the token data using a few rules like is the reward GOLD and is the amount greater than your max. Since this limit is on the server side, no one can tamper with it.
An important note here is that throughout the series we’ve had detailed exception messages for learning purposes, but in production you’d want to keep those messages vague. Instead, log the details via the Cloud Code logger. Otherwise you’re revealing your validation logic to anyone inspecting the error responses.

ValidateTokenUsage has a check against the previous token and a check that a reasonable amount of time has elapsed before the last reward. You’re not saving all adTokens, but you are saving the last one because that prevents someone calling this Cloud Code function with the same adToken token over and over.
In other words, LevelPlay legitimately offers them a reward for watching an ad, but they are using that legitimate data over and over again, like a copy machine and a legit check or receipt.
You probably need to make a couple of these PlayerDataService methods public at this point.
In HasTokenBeenUsed you’re just checking to see if the current adToken matches the previous one. There’s also a check on the ad interval.
Lastly, you have a very small method for storing the last ad token.

Go back into your PlayerDataService, to the SaveData method. Cloud Save will serialize your JSON string correctly when passed as an object but for clarity, add a SaveData overload. It takes a string parameter instead. That makes your intention explicit; you’re storing a preformatted JSON string, not an object that needs serialization.

Ad test devices
Before heading back into Unity, build your solution. Then, head back to the Unity Dashboard to set up your test devices which you can use to test specific networks. Test devices is in the left-side menu under Placements and Direct deals.
Adding a device is straight-forward: give the device a name and then, to find the advertising ID, follow the link as seen in this image:

Or, to see these last steps in action, see the video version of this tutorial from the 17:15 mark.
Once you’ve added and configured your test device, build and run your app again. If you’ve followed along with all of the tutorials, you should have the starting amount of gold and health potions, and a new player initialized and authenticated. Click Anonymous Sign-in if you aren’t seeing any gold or health potions.
When you click Watch Ad you’ll get an ad demo from the ad network you’ve configured. Hopefully, everything is working! The player gets something for the game – in this case, 200 GOLD – and you, as the developer, are making money.


To get the most out of this full series, we’ll remind you to check out the sample project on GitHub, where we’ve built upon everything we’ve covered here and shaped it into a fully featured metagame example. If you’ve gotten this far, you should be ready to dive into the sample!